Let us have a detailed look at creating azure functions using visual code, creating sharepoint context for getting site data, debugging locally using visual code, and deploying the code to Azure function app from visual code.
Creating Azure Function using Visual Code:
Setup and install the prerequisites for developing azure functions using visual code.
Install the visual code on your machine and install all prerequisites required for developing azure functions.
Install the latest of NodeJS.
Then install the core tools package required for working with Azure functions.
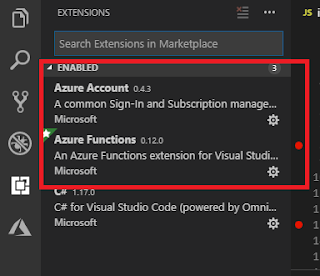
The extensions being enabled on the visual studio can be found in the following snapshot.
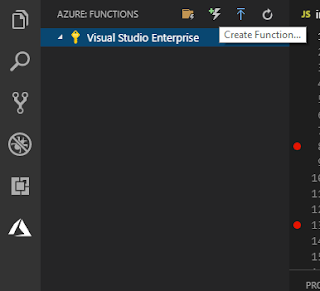
Once the visual code is ready, Create the Azure function from Azure tab on visual code.
Click on new project icon to create the project. Select the language as Javascript.
Then click on create function icon to add function to the project. You will be prompted for
thefunction folder,
function template,
the function name and
the authentication level.
This Microsoft Documentation has the detailed snapshots for the above steps.
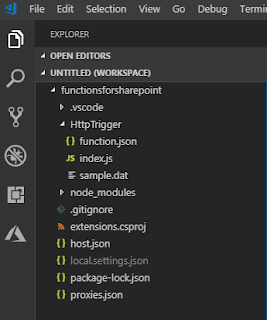
Created project structure will look like the snapshot below on visual code.
Accessing SharePoint Data using NodeJS
Create SharePoint App Permissions to grant necessary access to the calls triggered from Azure function.
The app permissions can be created from this request page (https://nakkeerann.sharepoint.com/_layouts/15/appregnew.aspx). Copy the client ID and client secret once generated for later use.
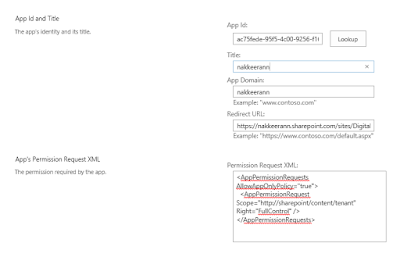
The necessary permissions are granted using permission request XML from this page (https://nakkeerann.sharepoint.com/_layouts/15/appinv.aspx).
The following snapshot shows the permissions being granted.
More details and documentation for creating SharePoint App authentication is present here.
From the Azure function project, install the necessary third party node modules. The required modules are
node-sp-auth -> For getting sharepoint authentication by passing the client credentials generated above.
request-promise -> For getting the SharePoint data using the authentication header and rest api url.
To install the node package, use npm install <node_module_name> --save Then replace the index.js file with the following code. Replace the site urls and client credentials according to your data.
var request = require('request-promise');
var spauth = require('node-sp-auth');
var siteUrl = 'https://nakkeerann.sharepoint.com';
var clientId = 'xxxxxxxx-xxxx-xxxx-xxxx-xxxxxxxxxxxx';
var clientSecret = 'client secret';
module.exports = async function (context, req) {
context.log('JavaScript HTTP trigger function processed a request.');
spauth.getAuth(siteUrl, {
clientId: clientId,
clientSecret: clientSecret
})
.then(function (data) {
context.res = {
status: 200,
body: data };
var restApi = "https://nakkeerann.sharepoint.com/_api/web/lists/getbytitle('Books')/items?$select=Title"; request.get(
{
url: restApi,
headers: data.headers,
json: true
})
.then(function (listData) {
var listResults = listData.value;
context.res = {
// status: 200, /* Defaults to 200 */
body: listResults
};
});
});
};
Let us look at debugging and deploying the code into Azure function in the next article.


Comments