Minimal APIs are architected to create HTTP APIs with minimal dependencies. They are ideal for microservices and apps that want to include only the minimum files, features, and dependencies in ASP.NET Core
Advantages of Minimal API:
Easy to start, even for newcomers.
Less boilerplate means we can go straight to the point.
Great for prototyping and microservices.
More choices on how we want to build our APIs.
Better performance than the MVC because of less overhead.
Disadvantages of Minimal API:
Compared to MVC, it may be harder to maintain as the project grows.
Project structure is not as obvious as in the MVC.
Some features from the standard MVC are missing.
Create an API with minimal API
Visual Studio 2022 with the ASP.NET and web development workload.

Create a Web API project
Using Visual Studio
Start Visual Studio 2022 and select Create a new project.
In the Create a new project dialog:
Enter API in the Search for templates search box.
Select the ASP.NET Core Web API template and select Next.
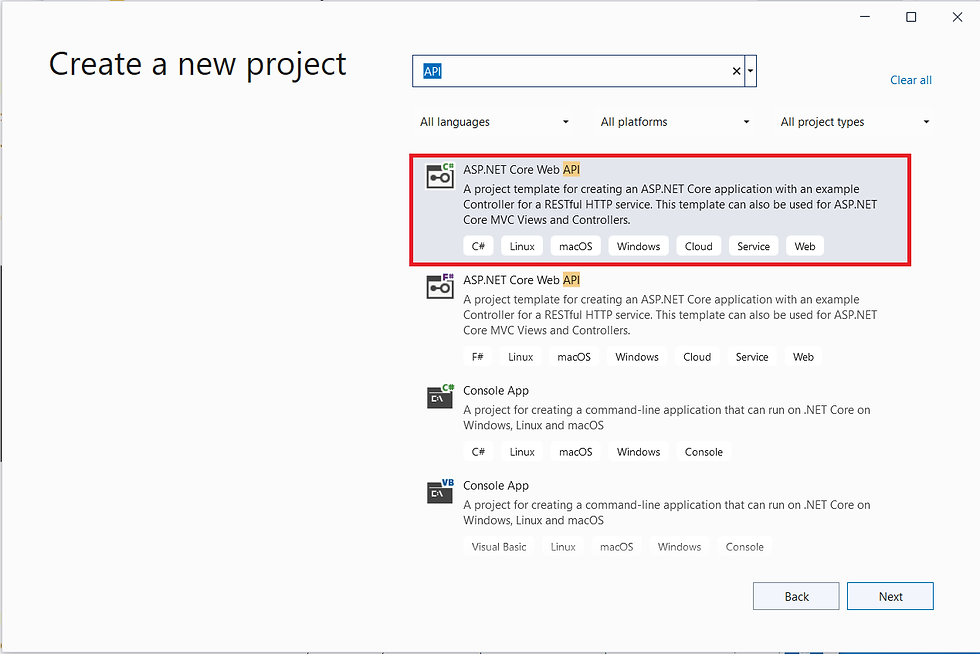
Name the project TodoApi and select Next.
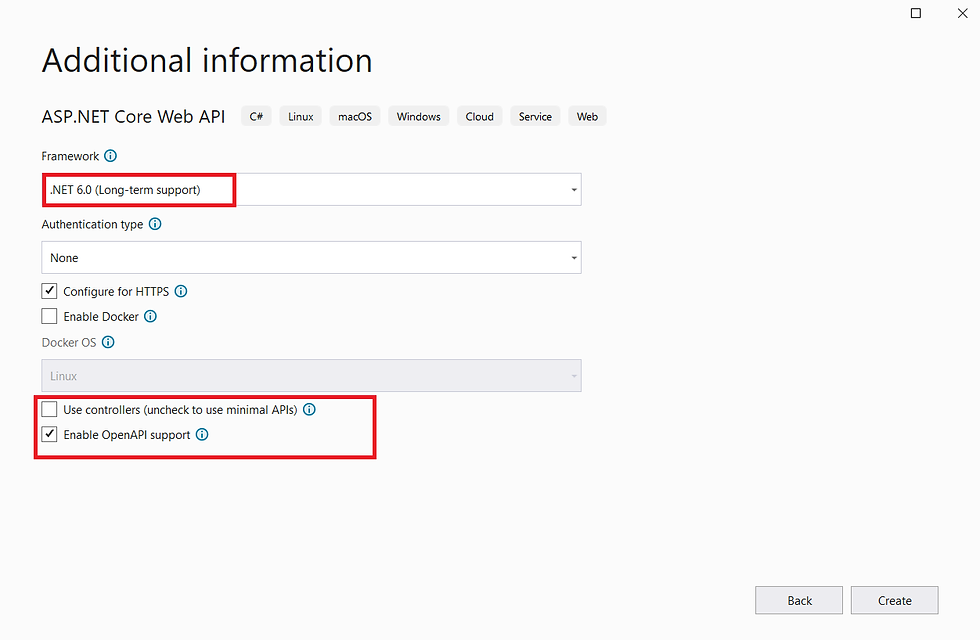
In the Additional information dialog:
Select .NET 6.0 (Long-term support)
Remove Use controllers (uncheck to use minimal APIs)
Select Create
Examine the code
The Program.cs file contains the following code:
var builder = WebApplication.CreateBuilder(args);

// Add services to the container.// Learn more about configuring Swagger/OpenAPI at https://aka.ms/aspnetcore/swashbuckle
builder.Services.AddEndpointsApiExplorer();
builder.Services.AddSwaggerGen();

var app = builder.Build();

// Configure the HTTP request pipeline.if (app.Environment.IsDevelopment())
{
    app.UseSwagger();
    app.UseSwaggerUI();
}

app.UseHttpsRedirection();

var summaries = new[]
{
    "Freezing", "Bracing", "Chilly", "Cool", "Mild", "Warm", "Balmy", "Hot", "Sweltering", "Scorching"
};

app.MapGet("/weatherforecast", () =>
{
    var forecast = Enumerable.Range(1, 5).Select(index =>
       new WeatherForecast
       (
           DateTime.Now.AddDays(index),
           Random.Shared.Next(-20, 55),
           summaries[Random.Shared.Next(summaries.Length)]
       ))
        .ToArray();
    return forecast;
})
.WithName("GetWeatherForecast");

app.Run();

internal record WeatherForecast(DateTime Date, int TemperatureC, string? Summary)
{
    public int TemperatureF => 32 + (int)(TemperatureC / 0.5556);
}
The project template creates a WeatherForecast API with support for Swagger. Swagger is used to generate useful documentation and help pages for web APIs.
The following highlighted code adds support for Swagger:
var builder = WebApplication.CreateBuilder(args);

// Add services to the container.// Learn more about configuring Swagger/OpenAPI at https://aka.ms/aspnetcore/swashbucklebuilder.Services.AddEndpointsApiExplorer();
builder.Services.AddSwaggerGen();var app = builder.Build();

// Configure the HTTP request pipeline.if (app.Environment.IsDevelopment())
{    app.UseSwagger();
    app.UseSwaggerUI();}
Run the app
Using Visual Studio
Press Ctrl+F5 to run without the debugger.
Visual Studio displays the following dialog:
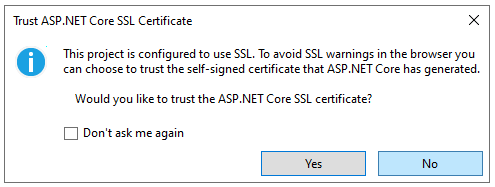
Select Yes if you trust the IIS Express SSL certificate.
The following dialog is displayed:
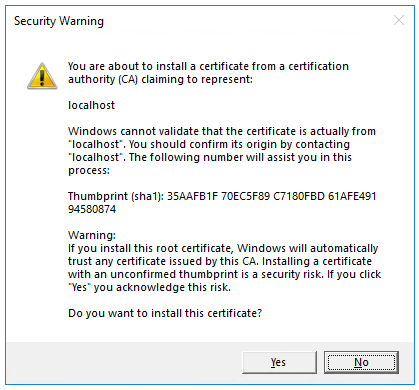
Select Yes if you agree to trust the development certificate. For information on trusting the Firefox browser, see Firefox SEC_ERROR_INADEQUATE_KEY_USAGE certificate error. Visual Studio launches the Kestrel web server.
The Swagger page /swagger/index.html is displayed. Select GET > Try it out> Execute. The page displays:
The Curl command to test the WeatherForecast API.
The URL to test the WeatherForecast API.
The response code, body, and headers.
A drop down list box with media types and the example value and schema.
Copy and paste the Request URL in the browser: https://localhost:<port>/WeatherForecast. JSON similar to the following is returned:
[
  {
    "date": "2021-10-19T14:12:50.3079024-10:00",
    "temperatureC": 13,
    "summary": "Bracing",
    "temperatureF": 55
  },
  {
    "date": "2021-10-20T14:12:50.3080559-10:00",
    "temperatureC": -8,
    "summary": "Bracing",
    "temperatureF": 18
  },
  {
    "date": "2021-10-21T14:12:50.3080601-10:00",
    "temperatureC": 12,
    "summary": "Hot",
    "temperatureF": 53
  },
  {
    "date": "2021-10-22T14:12:50.3080603-10:00",
    "temperatureC": 10,
    "summary": "Sweltering",
    "temperatureF": 49
  },
  {
    "date": "2021-10-23T14:12:50.3080604-10:00",
    "temperatureC": 36,
    "summary": "Warm",
    "temperatureF": 96
  }
]
Update the generated code
This tutorial focuses on creating a web API, so we'll delete the Swagger code and the WeatherForecast code. Replace the contents of the Program.cs file with the following:
var builder = WebApplication.CreateBuilder(args);
var app = builder.Build();

app.MapGet("/", () => "Hello World!");

app.Run();
The following highlighted code creates a WebApplicationBuilder and a WebApplication with preconfigured defaults:
var builder = WebApplication.CreateBuilder(args);
var app = builder.Build();
app.MapGet("/", () => "Hello World!");

app.Run();
The following code creates an HTTP GET endpoint / which returns Hello World!:
app.MapGet("/", () => "Hello World!");
app.Run(); runs the app.
Remove the two "launchUrl": "swagger", lines from the Properties/launchSettings.json file. When the launchUrl isn't specified, the web browser requests the / endpoint.
Run the app. Hello World! is displayed. The updated Program.cs file contains a minimal but complete app.
Add NuGet packages
NuGet packages must be added to support the database and diagnostics used in this tutorial.
From the Tools menu, select NuGet Package Manager > Manage NuGet Packages for Solution.
Enter Microsoft.EntityFrameworkCore.InMemory in the search box, and then select Microsoft.EntityFrameworkCore.InMemory.
Select the Project checkbox in the right pane and then select Install.
Follow the preceding instructions to add the Microsoft.AspNetCore.Diagnostics.EntityFrameworkCore package.
Add the API code
Replace the contents of the Program.cs file with the following code:
using Microsoft.EntityFrameworkCore;

var builder = WebApplication.CreateBuilder(args);
builder.Services.AddDbContext<TodoDb>(opt => opt.UseInMemoryDatabase("TodoList"));
builder.Services.AddDatabaseDeveloperPageExceptionFilter();
var app = builder.Build();

app.MapGet("/", () => "Hello World!");

app.MapGet("/todoitems", async (TodoDb db) =>
    await db.Todos.ToListAsync());

app.MapGet("/todoitems/complete", async (TodoDb db) =>
    await db.Todos.Where(t => t.IsComplete).ToListAsync());

app.MapGet("/todoitems/{id}", async (int id, TodoDb db) =>
    await db.Todos.FindAsync(id)
        is Todo todo
            ? Results.Ok(todo)
            : Results.NotFound());

app.MapPost("/todoitems", async (Todo todo, TodoDb db) =>
{
    db.Todos.Add(todo);
    await db.SaveChangesAsync();

    return Results.Created($"/todoitems/{todo.Id}", todo);
});

app.MapPut("/todoitems/{id}", async (int id, Todo inputTodo, TodoDb db) =>
{
    var todo = await db.Todos.FindAsync(id);

    if (todo is null) return Results.NotFound();

    todo.Name = inputTodo.Name;
    todo.IsComplete = inputTodo.IsComplete;

    await db.SaveChangesAsync();

    return Results.NoContent();
});

app.MapDelete("/todoitems/{id}", async (int id, TodoDb db) =>
{
    if (await db.Todos.FindAsync(id) is Todo todo)
    {
        db.Todos.Remove(todo);
        await db.SaveChangesAsync();
        return Results.Ok(todo);
    }

    return Results.NotFound();
});

app.Run();

class Todo
{
    public int Id { get; set; }
    public string? Name { get; set; }
    public bool IsComplete { get; set; }
}

class TodoDb : DbContext
{
    public TodoDb(DbContextOptions<TodoDb> options)
        : base(options) { }

    public DbSet<Todo> Todos => Set<Todo>();
}
The model and database context classes
The sample app contains the following model:
class Todo
{
    public int Id { get; set; }
    public string? Name { get; set; }
    public bool IsComplete { get; set; }
}
A model is a class that represents data that the app manages. The model for this app is the Todo class.
The sample app also contains the following database context class:
class TodoDb : DbContext
{
    public TodoDb(DbContextOptions<TodoDb> options)
        : base(options) { }

    public DbSet<Todo> Todos => Set<Todo>();
}
The database context is the main class that coordinates Entity Framework functionality for a data model. This class is created by deriving from the Microsoft.EntityFrameworkCore.DbContext class.
The following highlighted code adds the database context to the dependency injection (DI) container and enables displaying database-related exceptions:
var builder = WebApplication.CreateBuilder(args);builder.Services.AddDbContext<TodoDb>(opt => opt.UseInMemoryDatabase("TodoList"));
builder.Services.AddDatabaseDeveloperPageExceptionFilter();var app = builder.Build();
The DI container provides access to the database context and other services.
The following code creates an HTTP POST endpoint /todoitems to add data to the in-memory database:
app.MapPost("/todoitems", async (Todo todo, TodoDb db) =>
{
    db.Todos.Add(todo);
    await db.SaveChangesAsync();

    return Results.Created($"/todoitems/{todo.Id}", todo);
});Resource: Microsoft (Click to know more)
The Tech Platform

Comments