Introduction
In this article, you will see, how we can automate SharePoint list creation mechanism, using Azure Runbook jobs with PnP PowerShell.
Steps Involved
Creating Azure Automation Account.Importing PnP PowerShell references as module.Adding credentials.Create Runbook with the code.Test/Schedule.View the job results.
Note- Creation of an automation account, importing modules, adding credentials are explained in the links of articles, given below-
Here, I will explain more about implementing the logic to create a list.
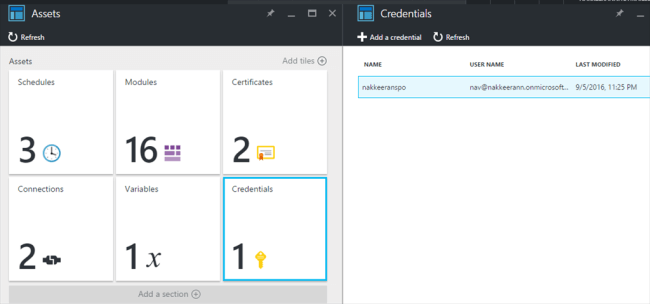
The snapshot, given below, shows the credentials added to the Azure automation portal.
The snapshot, given below, shows the required PnP PowerShell module imported to the gallery.
Create Runbook and Schedule
First, we will create a Runbook, using PowerShell Workflow type. PowerShell Workflow type is used to implement the complex logic. The inputs can be passed through the parameters, using PowerShell Workflow type.
Once created, we can view the script editor of Runbook.
For creating a list, we need the necessary input parameters set. The required input parameters can be-
a. Stored Credentials name.
b. Target SharePoint Site URL.
c. List Name.
d. List Template Name.
These parameters should be defined at the start of the Workflow method inside the Param() component. The code snippet, given below, shows the parameters defined.
Param(
[Parameter(Mandatory=$true)][string]
$CredentialsName,
[Parameter(Mandatory=$true)][string]
$SiteUrl,
[Parameter(Mandatory=$true)][String]
$ListName,
[Parameter(Mandatory=$true)][String]
$ListTemplate
)
Following the parameters component, the necessary code snippet should be written to create a list.
a. Get the credentials stored on the automation account.
b. Connect to SharePoint online portal, using the input parameters site URL and credentials.
c. Create a new list with the list name and list template type.
The code snippet, given below, helps to create a list on SharePoint Online from Azure Runbook. The logic is very similar to that of normal PowerShell execution.
$SPCredentials = Get-AutomationPSCredential -Name
$CredentialsName
Connect-SPOnline -Url
$SiteUrl -Credential
$SPCredentials
# Creates new list
Write-Output "Creating List" New-SPOList -Title
$ListName -Template $ListTemplate
Write-Output "Task Completed"
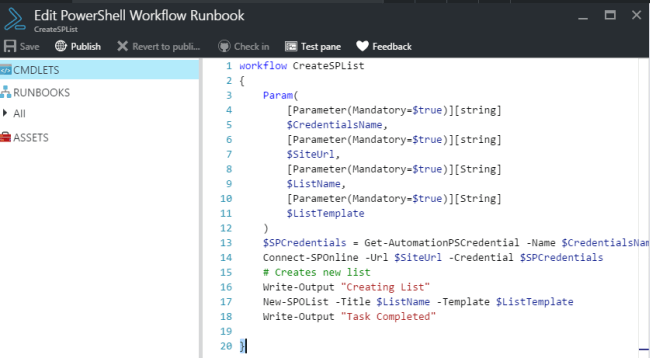
The snapshot, given below, shows the editor with the code snippet added-
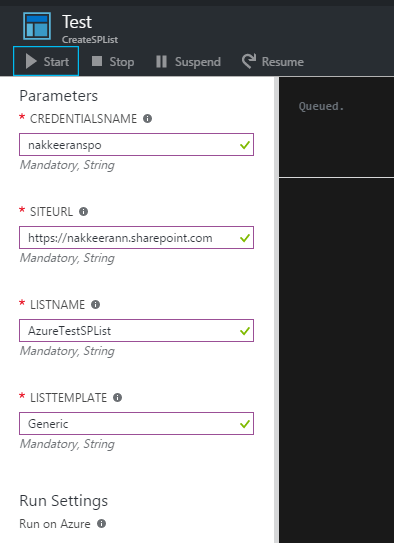
In this case, I will test Runbook, using test pane. Click the test pane under the editor. Provide the necessary credentials. Run the book by clicking start under test pane.
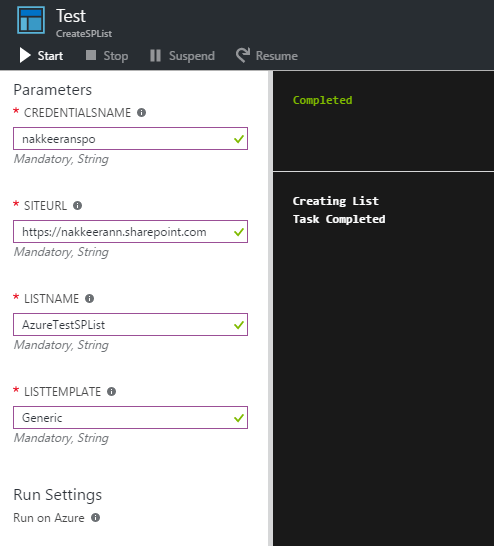
After sometimes, the test will complete. The results can be monitored from the test pane.
Now, navigate to SharePoint online site to check the created list. The snapshot, given below, shows the specified custom list created on the site.
If required, you can publish Runbook and create necessary schedules. Also, based on the requirements, you can call or run the book at the specified schedules. The article's link, given below, explains about publishing Runbook and scheduling jobs for Runbook.
Note- Runbook can be made as Webhooks, which will result in accessing Runbook, using http calls.
Summary
Thus, you have learned, how to create a list on SharePoint online sites, using Azure automation Runbook. Using created Runbook, the necessary schedules can be created and the jobs can be monitored from Runbook.


Comments