Here, let us look how the custom connectors can be created for accessing SharePoint data on Microsoft Flow.
Microsoft Flow provides multiple connectors from various services including SharePoint to work with the data. The connectors contain multiple triggers and actions. For SharePoint connector by Out of the Box, Microsoft provides 8 triggers and 28 actions on Microsoft flow.
UseCase: Imagine you want to retrieve the SharePoint user profile data of some user. Currently there is no action available for MS Flow developers to retrieve SharePoint user profile data. Such triggers and actions can be created by developers on the Microsoft Flow platform. In this post, let us look how one such custom action can be created and used on the Microsoft Flow platform.
The configuration involves the following steps.
Configuring Azure AD Application, which provides necessary permissions and helps in authenticating the calls made from Microsoft Flow.
Generating the collection file (Swagger) using postman tool, which will be used as base file while building the custom connector.
Configuring the custom connector, which will make call to SharePoint to get the required data with necessary inputs.
Testing the custom connector created above.
Creating/Configuring the flow, which will also use the custom connector we have created above.
Configure Azure AD Application for Flow Authentications:
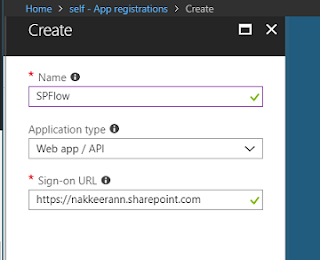
Create a new app on the Azure Active directory.
Go to keys under settings, and create a new password value and store the same. The password needs to be pasted on the Microsoft Flow portal.
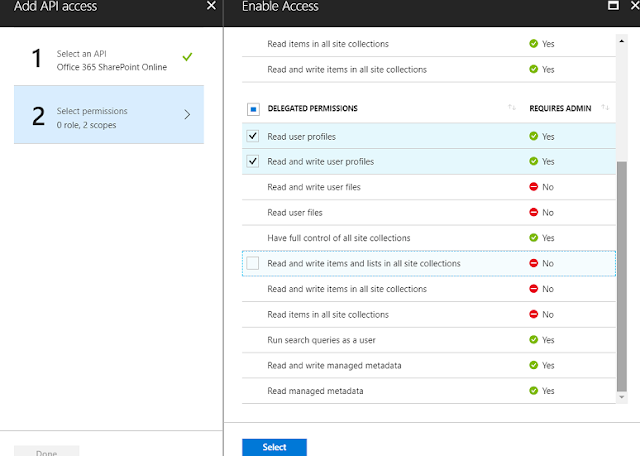
Select Required Permissions under API Access and select necessary permissions for accessing SharePoint user profile data. The following snapshot shows the permissions selected.
Reply URL needs to be updated once you configure the custom connector security details.
Generate the Collection File for Custom Connector:
This collection file is otherwise called as Swagger file.
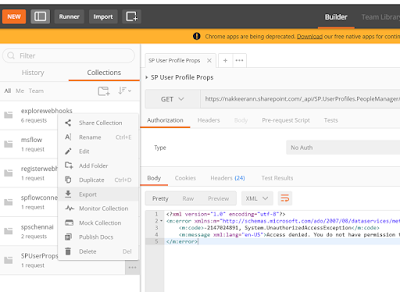
Open the postman tool, and create new collection.
Paste the necessary SharePoint user profile rest API on the request URL box. In this case, user profile properties will be retrieved by passing the account name.
The REST API will be like, https://nakkeerann.sharepoint.com/_api/SP.UserProfiles.PeopleManager/GetUserProfilePropertyFor(accountName=@v,propertyName='PreferredName')?@v='i:0#.f|membership|nav@nakkeerann.onmicrosoft.com'
Save the collection.
Export the collection from the collections tab.
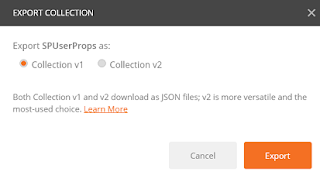
Select collection v1 option while exporting.
Save the collection file in the JSON format (provide the file type explicitly, if not listed).
Configuring Custom Office 365 SharePoint Connector:
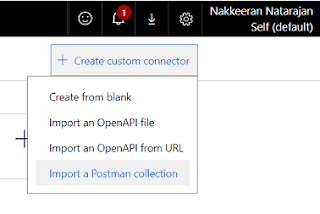
Login to the Microsoft Flow portal, and on right top corner click on the settings icon and then click on custom connectors option.
Select Import a Postman collection option.
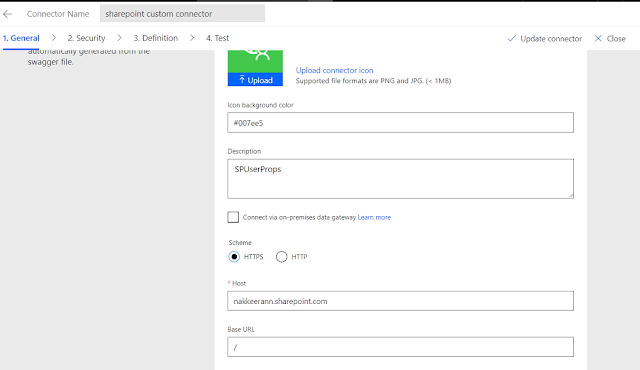
Provide the custom connector title value and upload the collection downloaded above.
The host and Base URL will be auto populated using the file uploaded.
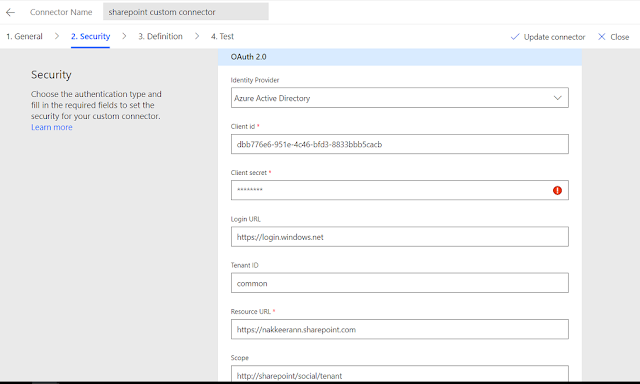
In the security tab, Select the authentication type as OAuth 2.0.
Select Azure Active Directory as identity provider.
Paste the Azure APP ID created before as client ID.
Paste the generated Azure APP password in the client secret.
Login URL will be https://login.windows.net
Tenant ID can be “common”. (App will be identified/authenticated using the client ID)
Resource URL will be the SharePoint online site collection URL. (in this case https://nakkeerann.sharepoint.com)
The scope will be http://sharepoint/social/tenant
When you save the connector, redirect URL will be auto generated.
Note: Copy the redirect URL from the Microsoft Flow security tab and paste it in the Azure AD App reply URL input box and save it.
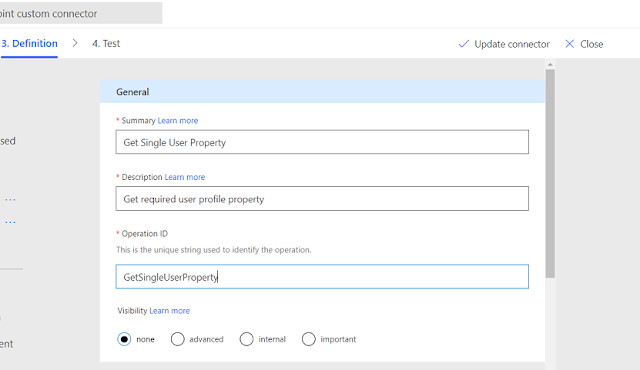
In the definition tab,
Provide the summary, description and the appropriate operation ID as shown below.
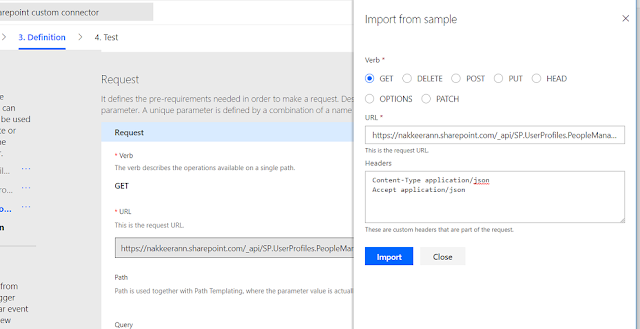
Define the pre-requisites needed for making request under the Request section. Click on Import from Sample button and provide the necessary details.
Update the connector. Your request sample details should like the below snapshot.
Test the Custom Connector:
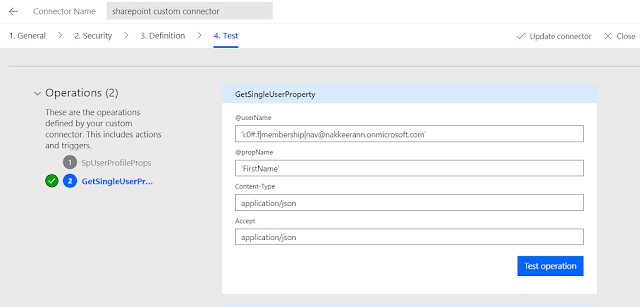
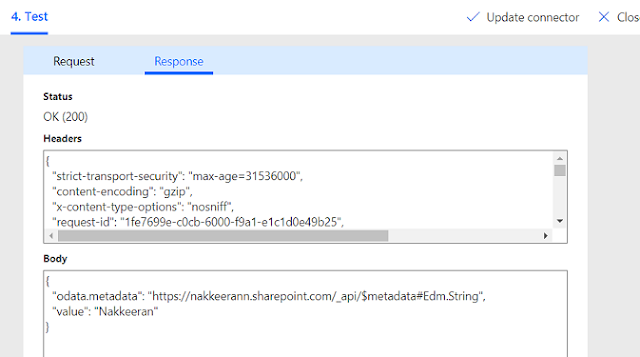
Proceed to Test tab. And then from the left pane, select the operation you have created in the above step. Click on the new connection. Authenticate the new connection by providing the credentials. Provide the necessary inputs to get the user profile property.
The following snapshot shows the request test details.
Configure the Flow with the Office365 SharePoint custom connector:
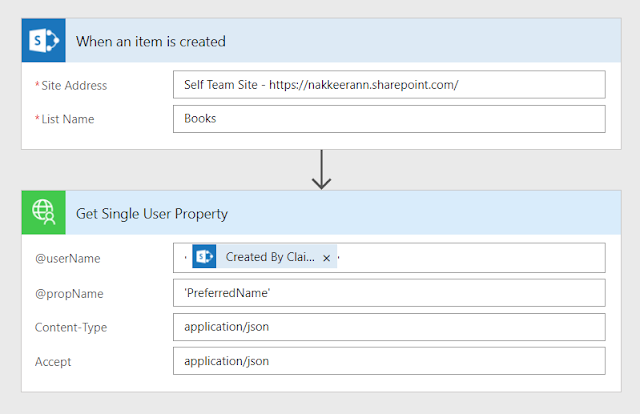
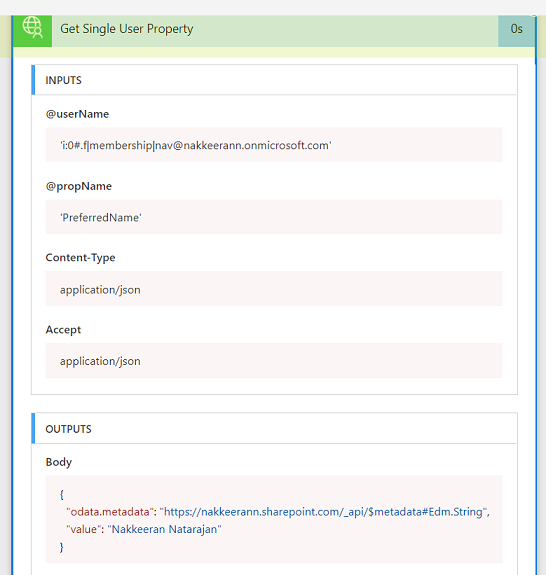
Go to the my flows tab on the flow portal. Configure the flow in such a way that, whenever item is created in SharePoint list, it gets the preferred name of the created by user. The following snapshot shows the flow configuration.
Go to respective SharePoint list and create any item. Then the flow will be triggered. The following snapshot shows the output of a sample trigger. It contains the item creator’s preferred name.












Comentarios