Before reading this article, I highly recommend reading my previous parts:
Design Manager in SharePoint 2013 / Office 365 – Part One
Design Manager In SharePoint 2013 & Office 365 – Part Two
Welcome to an article on the most important new functionality on our SharePoint 2013 and Office 365 site which is none other than “Design Manager.”
Branding is everything now among all organizations. A site should have it all to attract its users. Earlier, SharePoint Designer was an extra tool to do so, but now we have Design Manager right at your site collection.
You have to enable your publishing feature on your site collection and you will have a list of features available on your site settings of the site collection.
Welcome
Manage Device Channels
Upload Design Files
Edit Master Pages
Edit Display Templates
Edit Page Layouts
Publish and Apply Design
Create Design Package
All the above have awesome functionalities which will help you to do a lot of things with your master pages, page layouts, html and css files all in here.
Upload Design Files:
If I tell you that you just have to copy and paste your html files, CSS files, JS Files in a map drive and it’s done, I know you won’t believe it.
Once you copy the files, your files are in SharePoint ready to be inherited by your site.
You can see we have a link on the right corner of the screenshot, just copy that and map it. You can upload the HTML version of the master page you want to upload or your css and JavaScript files.
How do you map a site in your network drive
Click My Computer on your local machine.
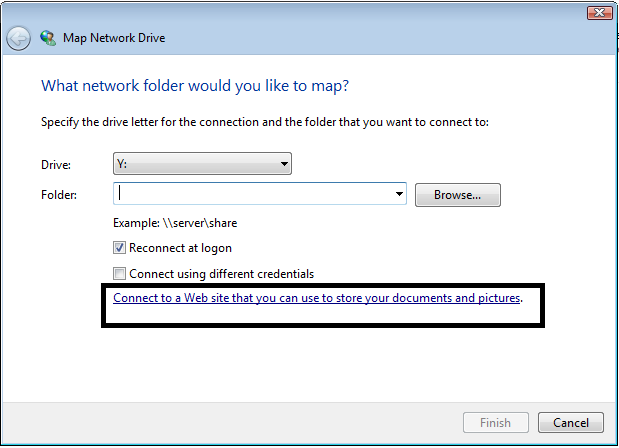
Click Map network drive.
Click on the option “Connect to a Web site that you can use to store your document and pictures.”.
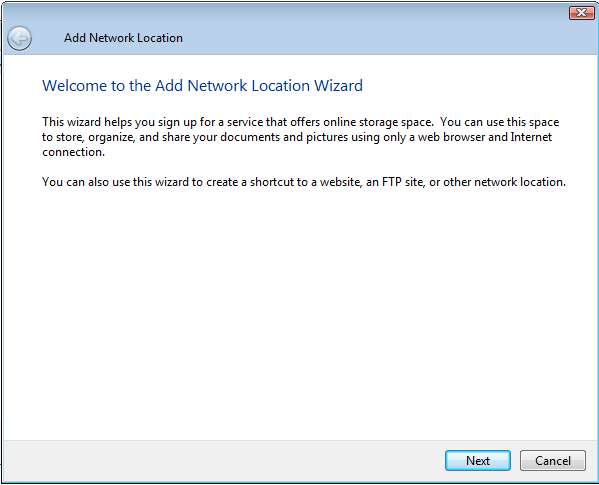
Click on Next.
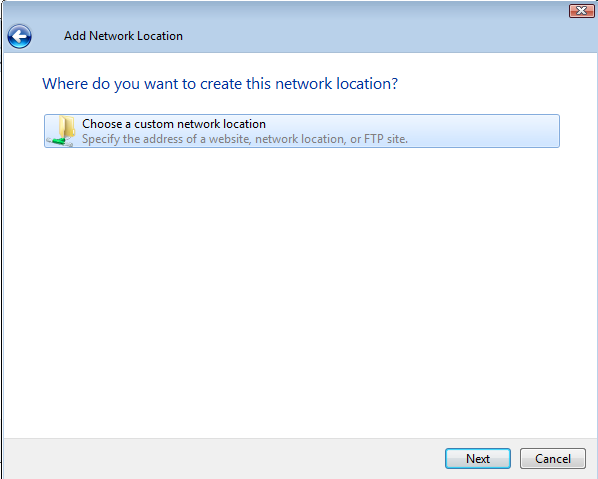
Choose the option and Click on Next.
You will be asked to provide your site link.
Once added, click on next.
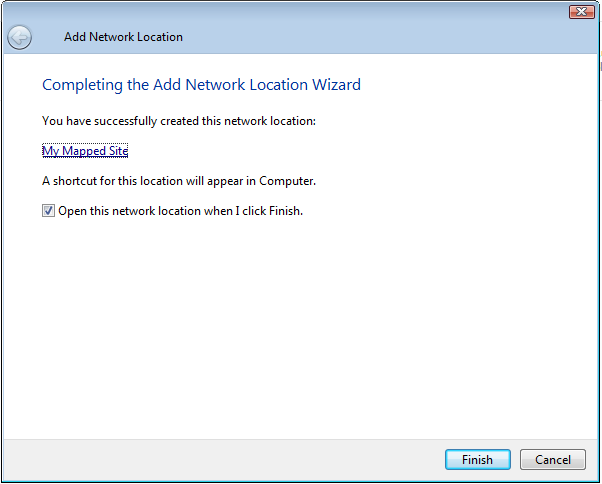
Provide a name for your mapped site.
Here you are good to go.
Once you click on Finish, the library will be directly on your local folder where you can edit your files or copy or move them and it will directly get updated in SharePoint.
So pick up your machine and start uploading your design files. Isn’t it amazing!
Here we saw today an article on Design Manager in SharePoint 2013 & Office 365 with the third configuration panel ‘Upload Design Files on the list. There are more to come. Keep reading and keep learning!


Comments