Introduction
In this article, you will see how to detect language and translate text using Microsoft Translator Service and Microsoft Flow. I have created a simple SharePoint list, which contains Title, Original Language and Translated Text fields as shown below.
Flow Design
Get Subscription Key
Navigate to Azure Portal here.
In the left navigation, click Create a resource.
In Azure Marketplace, select AI + Machine Learning and then click Translator Text.
Enter the required details and click Create.
It might take few minutes to deploy the resource.
Click All Resources in the left navigation and then click the newly created translator text resource.
Click Keys under Resource Management, copy the Key value.
Create Flow
Navigate to flow site here.
In the top navigation, click My flows.
Click Create from blank.
Select When an item is created Select the Site Address and List Name as shown below.
Click Next Step and search for Microsoft Translator as shown below. Select Detect Language
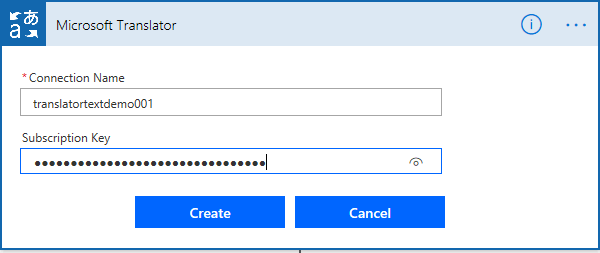
Enter the following details and click Create.
Connection Name – user-friendly name for connection
Subscription Key – Copied from above Get Subscription Key section
Select the dynamic content Title for Text field from previous action.
Click Next Step and search for Microsoft Translator. Select Translate TextSelect the dynamic content Title for Text from previous action – When an item is created. Select the target language as English as shown below.
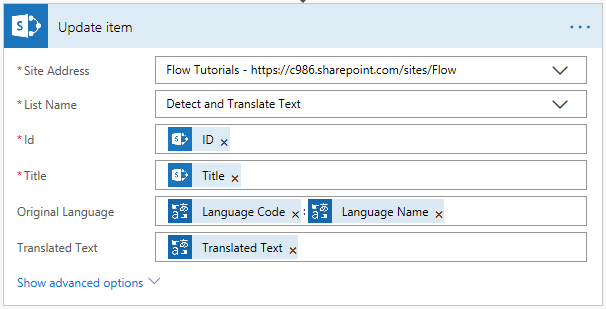
Click Next Step and add Update item action. Configure the values as shown below.
Enter the Title for the flow and click on Save.
Test the Flow
Navigate to SharePoint list and create a new item with different language. Flow executes to update the list item as shown below.
Summary
Thus in this article, you saw how to detect language and translate the text using Microsoft Translator and Flow.


Comments