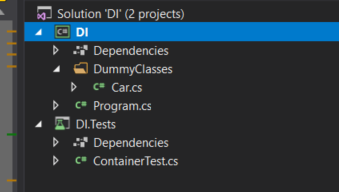
After performing the good old ‘File -> new project’ routine, I am facing an empty .net core project and a unit test project.
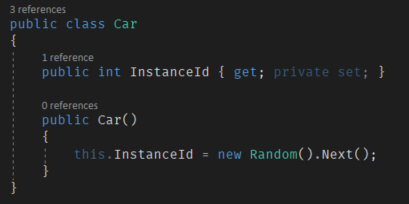
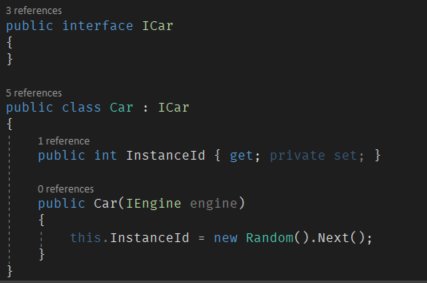
Then, I create a simple class ‘Car’, which may be an overused example but that’s hardly the point. For ease of debugging and testing, I added a property to identify different instances of the class.
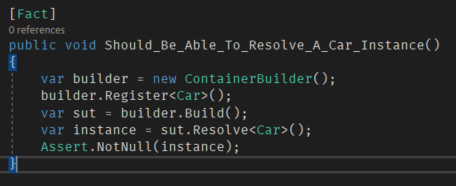
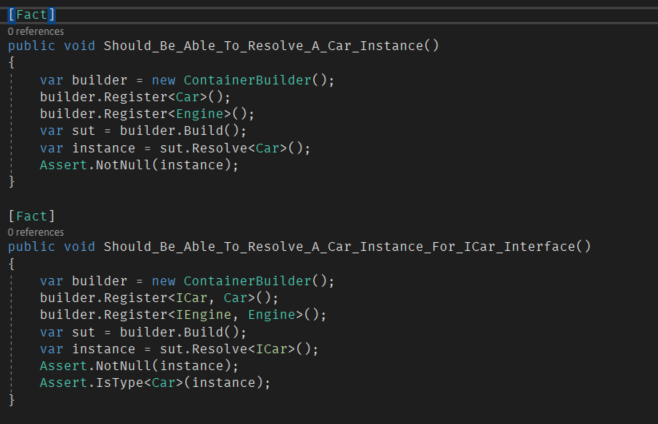
Let’s write our first simple test:
For now, I will keep it as simple as possible:
Like any DI framework, I will need a ContainerBuilder to keep track of all the types I would want to instantiate.
I register the Car type
Build the Container
Resolve the Car and see if it works
Of course none of this will compile at this point, since none of these classes exist. Let’s start off with the beginning: the ContainerBuilder
The ContainerBuilder
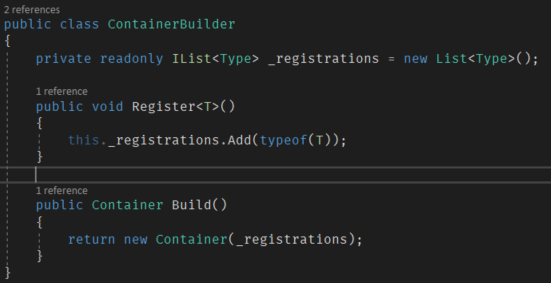
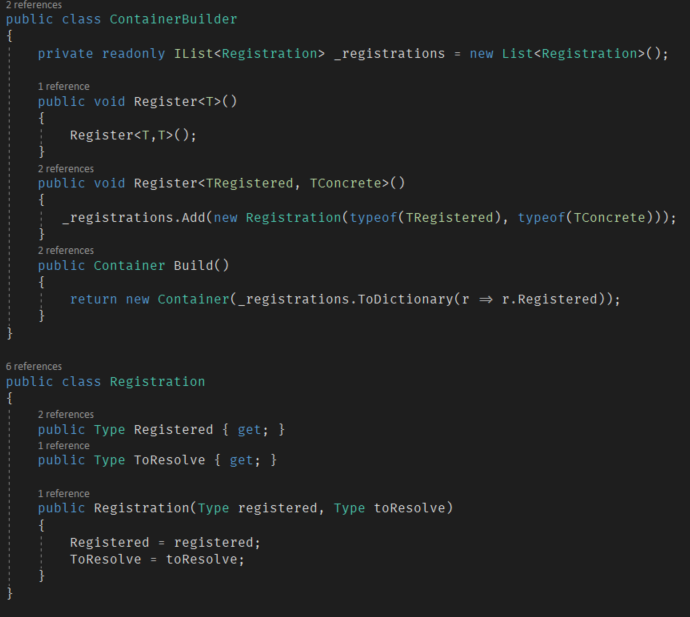
The first task of the ContainerBuilder is to keep track of all the registrations. Next, implement the Build method, which will hand down the registrations to a Container object and return it.
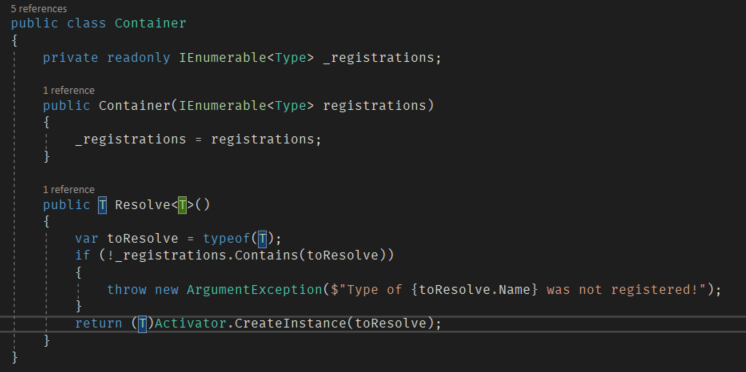
The container then implements a basic Resolve where I use the .NET Activator to create an instance of the type.
This basic implementation already satisfies my test. For now this looks like an expensive wrapper around Activator , but I will add more features.
The cool stuff: interfaces
Even though this works, it can hardly manage all my dependencies. One of the most important features of a DI container is to associate a contract (interface) with a concrete implementation. This way any class can express the need for a kind of dependency without coupling to a concrete class.
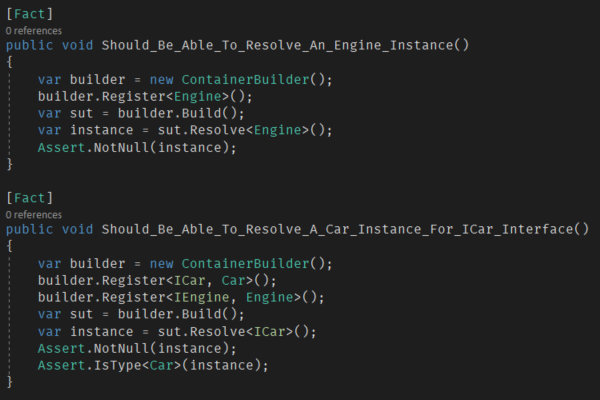
Let’s adjust my Register method so that it supports this feature and write a new unit test to resolve our car based on an interface ICar
The way of registering types I’m currently using won’t do. The collection of registrations is not able to track the association. OOP to the rescue!
Rather than keeping a list of types, let’s create an object Registration which will allow me to track all the relevant metadata for my container.
The class registration contains 2 properties at the moment.
the type to resolve
the concrete type to satisfy the revolve
To boost performance, I convert the IListto a Dictionary. My updated ContainerBuilder now looks like this:
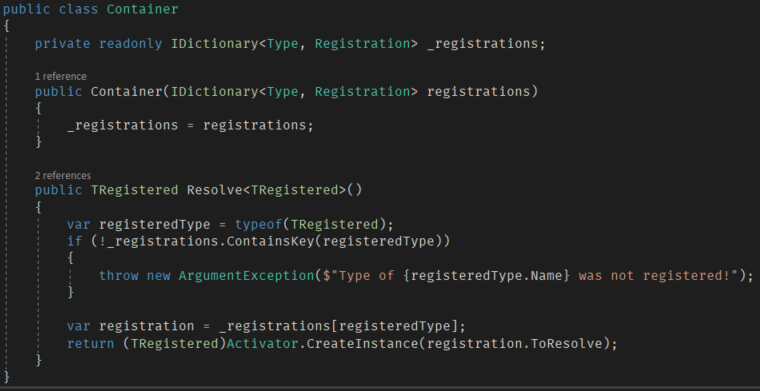
In my Resolve method, I need to lookup the registration first. Now you can already start seeing the benefits of the method, where before it was just a wrapper around Activator .
Let’s run some tests aaaaaaand …
The real deal: adding dependencies
For the last part in my blog, I’ll add the ability to resolve constructors. For now, the container doesn’t bother about any constructor parameters, so it is very unlikely to be of any use in a real project.
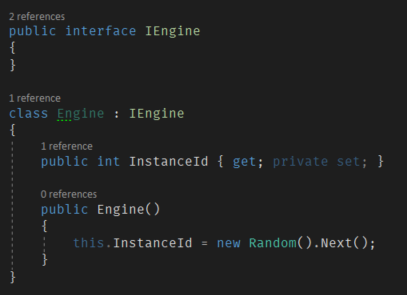
Let’s add a dependency of IEngine to the Car class.
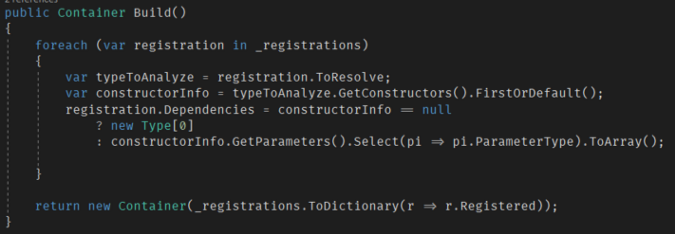
In order to be able to get this working again, I need to add a bit more data to the registration. I need to know what dependencies are needed, resolve them, and hand them to the activator. For performance reasons, this is done in the ContainerBuilder since this should only happen once. Dependencies do not change at runtime. For now, I will only support the first constructor of a class.
Firstly, I update my unit tests to include the Engine registration:
In the Build method, I use reflection to :
get the constructor
if it is not null, get the types parameters of the constructor
store the types in an array as part of the registration
Surprisingly, I have very few changes to make to my Container .
Refactor the Resolve method to support non generic syntax
Use the resolve method to create an instance for every dependency
Pass the collection of instances to the Activator
Profit!
Final thoughts
I thought it was easy, and apparently it is. My code contains fewer lines of code than I expected. The code on github is a bit mote advanced, but only slightly with a lot of comments. On github you will find 2 more features:
child containers
lifetime scope
Both of these are simple changes, given the code base from this blog. Feel free to ask questions or comment.
Source: Medium
The Tech Platform














Comments