Azure Data Explorer is a fast and highly scalable data exploration service for log and telemetry data. To use Azure Data Explorer, you first create a cluster, and create one or more databases in that cluster. Then you ingest (load) data into a database so that you can run queries against it. In this quick-start, you create a cluster and a database.
If you don't have an Azure subscription, create a free Azure account before you begin.
Sign in to the Azure portal
Sign in to the Azure portal.
Create a cluster
Create an Azure Data Explorer cluster with a defined set of compute and storage resources in an Azure resource group.
Select the + Create a resource button in the upper-left corner of the portal.
Search for Azure Data Explorer.
Under Azure Data Explorer, at the bottom of the screen, select Create.
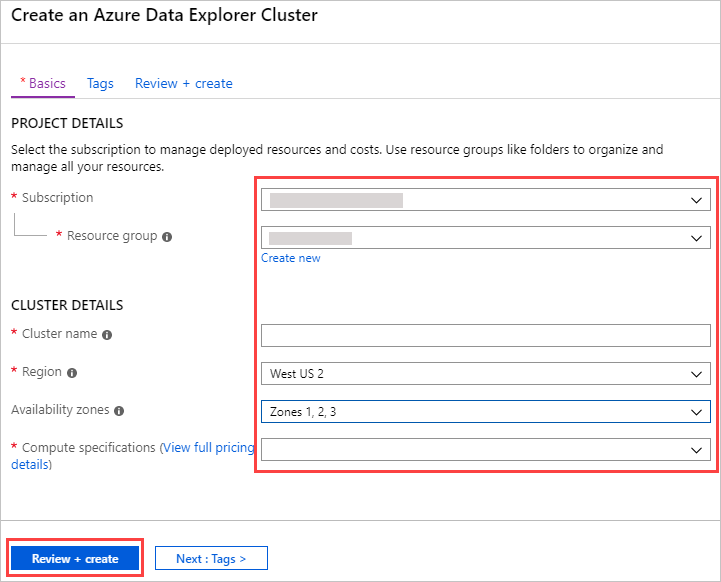
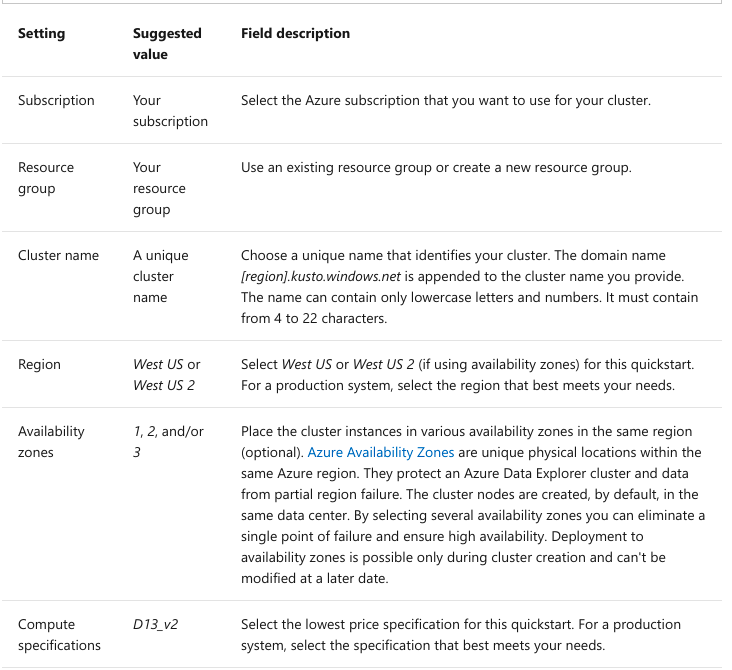
Fill out the basic cluster details with the following information.
Select Review + create to review your cluster details, and Create to provision the cluster. Provisioning typically takes about 10 minutes.
When the deployment is complete, select Go to resource.
Create a database
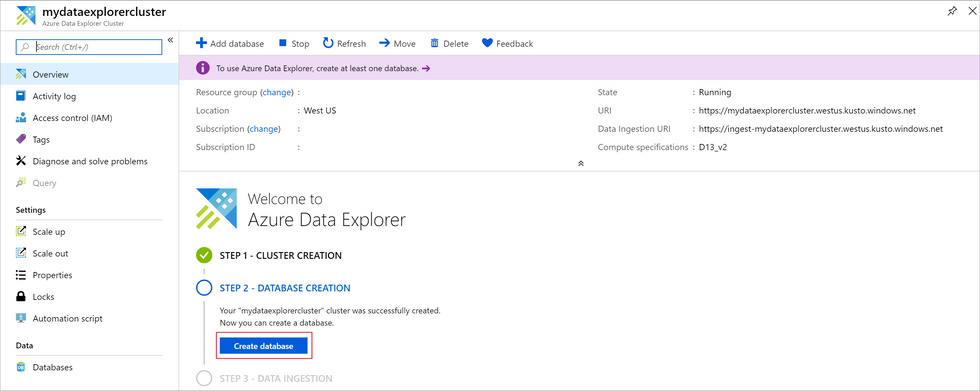
You're now ready for the second step in the process: database creation.
On the Overview tab, select Create database.
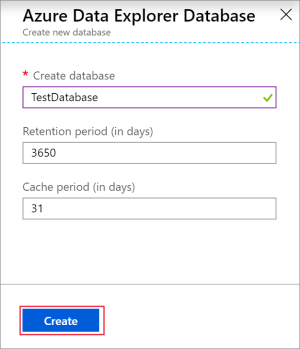
Fill out the form with the following information.
Select Create to create the database. Creation typically takes less than a minute. When the process is complete, you're back on the cluster Overview tab.
Run basic commands in the database
Now that you have a cluster and database, you can run queries and commands. You don't have any data in the database yet, but you can still see how the tools work.
Under your cluster, select Query. Paste the command .show databases into the query window, then select Run.
The result set shows TestDatabase, the only database in the cluster.
Paste the command .show tables into the query window and select Run. This command returns an empty result set because you don't have any tables yet. You add a table in the next article in this series.
Stop and restart the cluster
You can stop and restart a cluster depending on business needs.
To stop the cluster, at the top of the Overview tab, select Stop.
To restart the cluster, at the top of the Overview tab, select Start. When the cluster is restarted, it takes about 10 minutes for it to become available (like when it was originally provisioned). It takes additional time for data to load into the hot cache.
Clean up resources
If you plan to follow other quick-starts and tutorials, keep the resources you created. Otherwise, clean up your resource group, to avoid incurring costs.
In the Azure portal, select Resource groups on the far left, and then select the resource group that contains your Data Explorer cluster.
Select Delete resource group to delete the entire resource group. If using an existing resource group, you can choose to only delete the Data Explorer cluster.
Source: microsoft


Comments