Many React tutorials describe long processes that lead to the successful use of .focus() with React. The .focus() method tells the browser which element is being acted on, similar to .click() or an actual click. At least with React 16.9.0, using .focus() with the React’s virtual DOM isn’t too difficult.
In this article, we will first discuss the easy way to use .focus() with React and then go into an example.
Note: This example only works for searching elements within the same class.
Why?
The .focus() method can guide users to enhance the user interface and clarify appropriate use, and it is especially useful to mobile users where clicking and navigating can be more difficult.
A finished project of .focus() helping enhance the UI
Making a Reference — “ref”
Inside a class, you can add a “ref” attribute to an element, which takes in the following value.
ref={ x => this.y = x }Above, “x” represents the iterative variable, and “y” is the name you chose to represent that “ref.” You can name both whatever you like.
Calling .focus() on the “ref”
After the step above, you can access that element within the same class by calling “this.y” (or whatever name you chose instead of “y”). If you would like to focus on that element, it’s as simple as
this.y.focus()Example
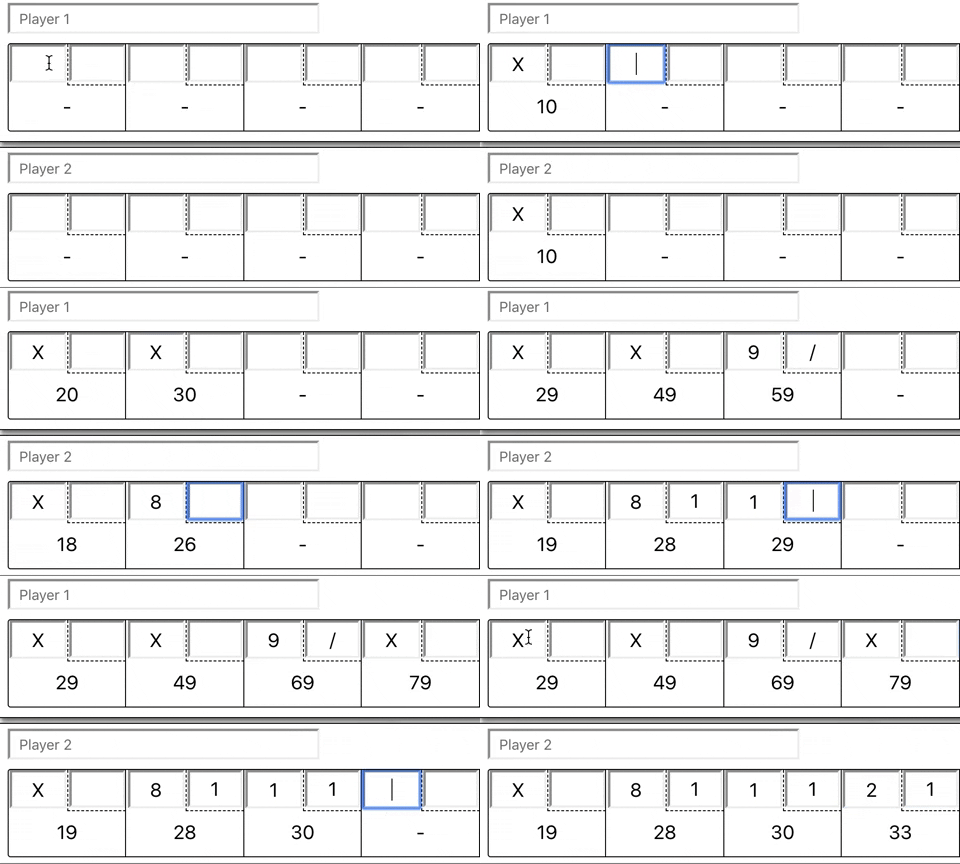
I recently made a bowling scoring app, where .focus() helped increase usability (especially on mobile, because there are lots of inputs) and also helped guide the user through possibly confusing scoring rules. Here, we will cover a simplified version about creating the ref and then calling .focus() on it.
The finished example
Creating Elements and Their References
First, I used a “for” loop to create an array of 21 empty strings, which represent 2 possible rolls for each of the 10 frames of bowling, and the 10th frame can possibly have 3 rolls. Inside state, put this array as a value to a “rolls” key.
Next, we need to make the elements and the references inside the elements. Inside the return(), I mapped over each empty string to create the inputs and their refs.
{this.state.rolls.map((roll,index)=>{
    return<inputtype="text"
    value={this.state.rolls[index]}
    ref={input=>this[`roll-${index}`]=input}
    onChange={this.handleChange}
    key={index}id={index}
/>
})
}
Now we have our inputs, each with their own references.
Using the References
As described above, we can access each of those references using this[“roll-0”] or whatever the index of the desired roll is. I added the logic to determine the next .focus() in the .handleChange() function.
handleChange=(e)=>{
    constindex=parseInt(e.target.id)
    constnewRolls=[...this.state.rolls]
    newRolls[index]=e.target.value
    this.setState({rolls: newRolls})
    if(index<20){
    // unless we are on the last possible roll, #21 / index 20
        this[`roll-${index+1}`].focus()
    }
}
In this .handleChange() function, we determine the index of the input and make a copy of “this.state.rolls” before updating the appropriate index with the new value and setting the state to make the new value appear. Lastly, if we are on any input except the last one, this will focus on the next input automatically to help move the user along.
The finished working example
Thanks for reading! Happy coding!
Source: Medium.com


Comments