Apps that you create in Power Apps behave very much like Excel. Instead of updating cells, you can add controls wherever you want on a screen and name them for use in formulas.
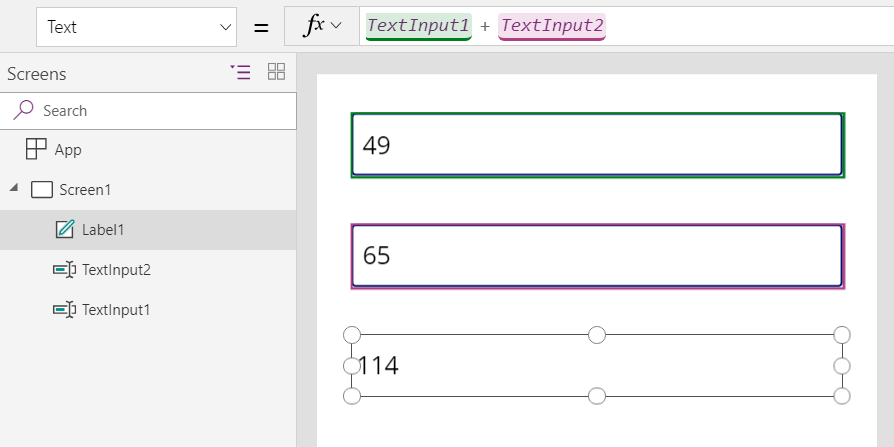
For example, you can replicate the Excel behavior in an app by adding a Label control, named Label1, and two Text input controls, named TextInput1 and TextInput2. If you then set the Text property of Label1 to TextInput1 + TextInput2, it will always show the sum of whatever numbers are in TextInput1 and TextInput2 automatically.
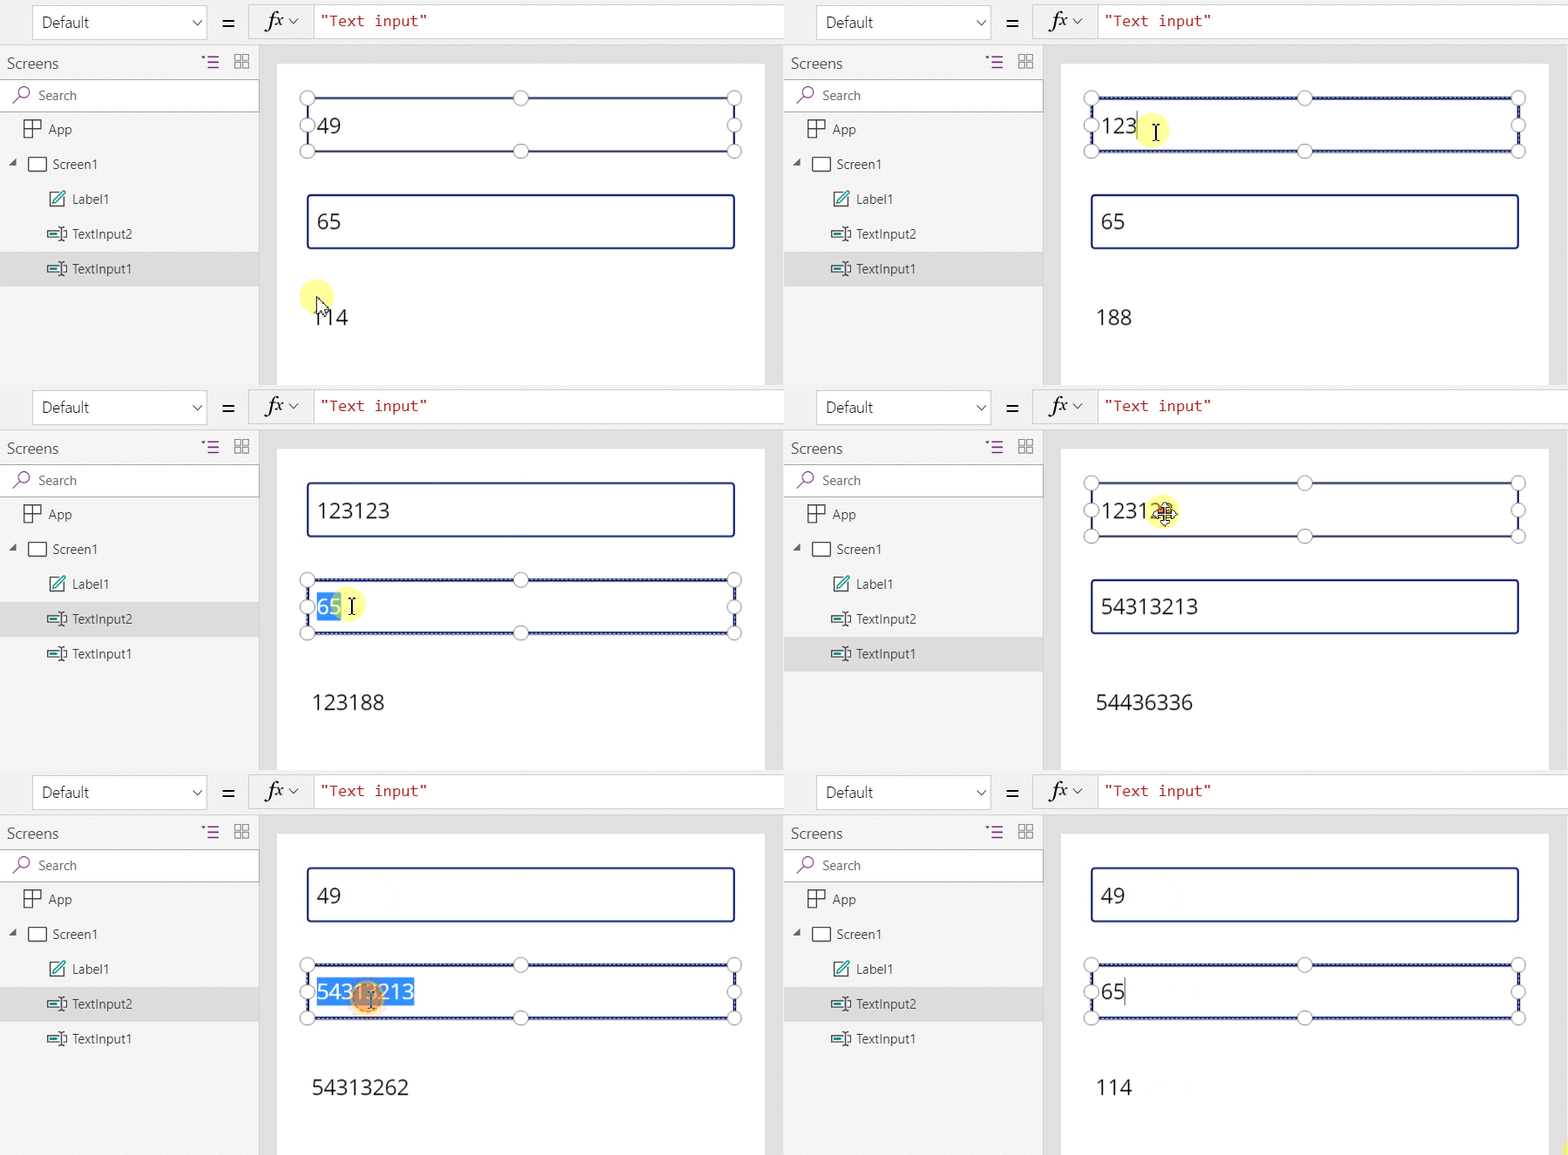
Notice that the Label1 control is selected, showing its Text formula in the formula bar at the top of the screen. Here we find the formula TextInput1 + TextInput2. This formula creates a dependency between these controls, just as dependencies are created between cells in an Excel workbook. Let's change the value of TextInput1:
The formula for Label1 has been automatically recalculated, showing the new value.
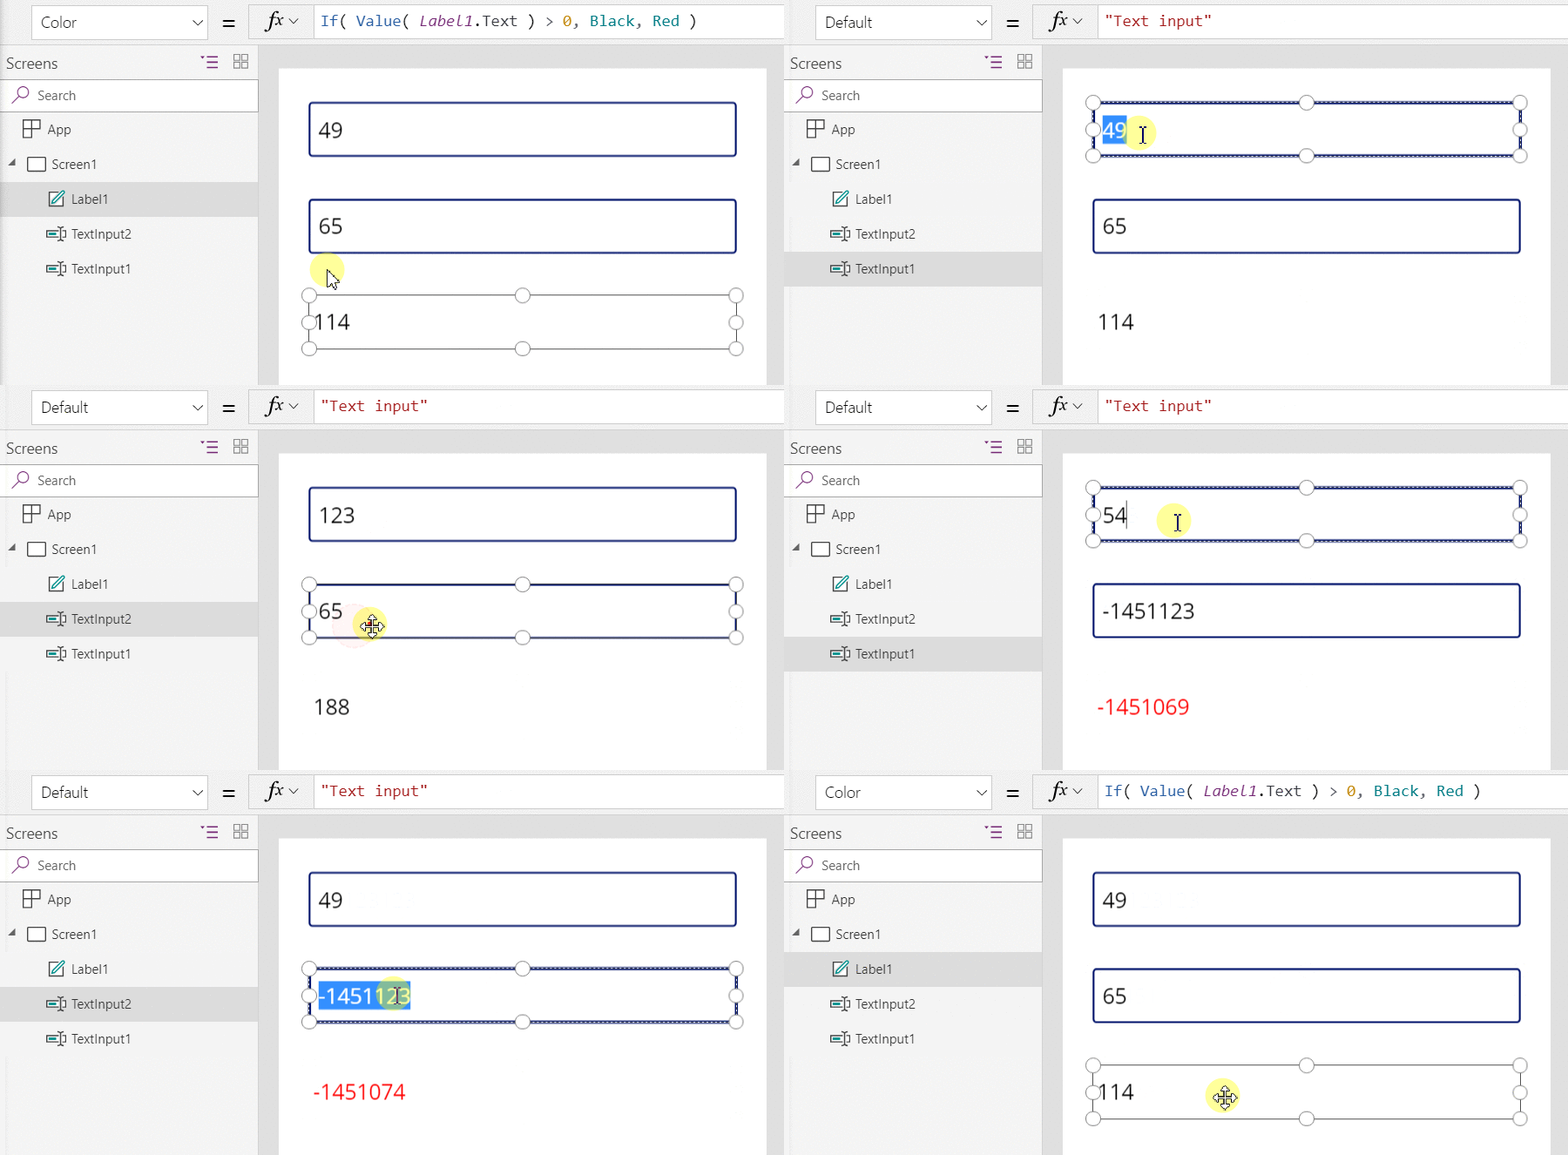
In Power Apps, you can use formulas to determine not only the primary value of a control but also properties such as formatting. In the next example, a formula for the Color property of the label will automatically show negative values in red. The If function should look familiar from Excel:
If( Value(Label1.Text) < 0, Red, Black )You can use formulas for a wide variety of scenarios:
By using your device's GPS, a map control can display your current location with a formula that uses Location.Latitude and Location.Longitude. As you move, the map will automatically track your location.
Other users can update data sources. For example, others on your team might update items in a SharePoint list. When you refresh a data source, any dependent formulas are automatically recalculated to reflect the updated data. Furthering the example, you might set a gallery's Items property to the formula Filter( SharePointList ), which will automatically display the newly filtered set of records.
Benefits
Using formulas to build apps has many advantages:
If you know Excel, you know Power Apps. The model and formula language are the same.
If you've used other programming tools, think about how much code would be required to accomplish these examples. In Visual Basic, you'd need to write an event handler for the change event on each text-input control. The code to perform the calculation in each of these is redundant and could get out of sync, or you'd need to write a common subroutine. In Power Apps, you accomplished all of that with a single, one-line formula.
To understand where Label1's text is coming from, you know exactly where to look: the formula in the Text property. There's no other way to affect the text of this control. In a traditional programming tool, any event handler or subroutine could change the value of the label, from anywhere in the program. This can make it hard to track down when and where a variable was changed.
If the user changes a slider control and then changes their mind, they can change the slider back to its original value. And it's as if nothing had ever changed: the app shows the same control values as it did before. There are no ramifications for experimenting and asking "what if," just as there are none in Excel.
In general, if you can achieve an effect by using a formula, you'll be better off. Let the formula engine in Power Apps work for you.
Know when to use variables
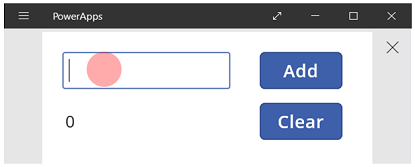
Let's change our simple adder to act like an old-fashioned adding machine, with a running total. If you select an Add button, you'll add a number to the running total. If you select a Clear button, you'll reset the running total to zero.
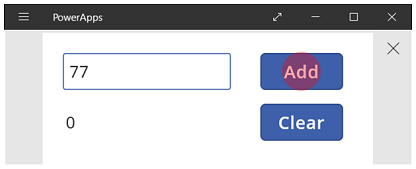
Display Description
When the app starts, the running total is 0. The red dot represents the user's finger in the text-input box, where the user enters 77.
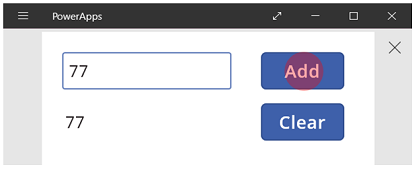
The user selects the Add button.
77 is added to the running total. The user selects the Add button again.
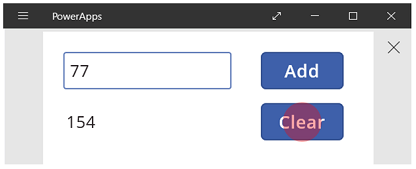
77 is again added to the running total, resulting in 154. The user selects the Clear button.
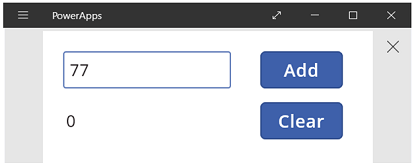
The running total is reset to 0.
Our adding machine uses something that doesn't exist in Excel: a button. In this app, you can't use only formulas to calculate the running total because its value depends on a series of actions that the user takes. Instead, our running total must be recorded and updated manually. Most programming tools store this information in a variable.
You'll sometimes need a variable for your app to behave the way you want. But the approach comes with caveats:
You must manually update the running total. Automatic recalculation won't do it for you.
The running total can no longer be calculated based on the values of other controls. It depends on how many times the user selected the Add button and what value was in the text-input control each time. Did the user enter 77 and select Add twice, or did they specify 24 and 130 for each of the additions? You can't tell the difference after the total has reached 154.
Changes to the total can come from different paths. In this example, both the Add and Clear buttons can update the total. If the app doesn't behave the way you expect, which button is causing the problem?
Use a global variable
To create our adding machine, we require a variable to hold the running total. The simplest variables to work with in Power Apps are global variables.
How global variables work:
You set the value of the global variable with the Set function. Set( MyVar, 1 ) sets the global variable MyVar to a value of 1.
You use the global variable by referencing the name used with the Set function. In this case, MyVar will return 1.
Global variables can hold any value, including strings, numbers, records, and tables.
Let's rebuild our adding machine by using a global variable:
Add a text-input control, named TextInput1, and two buttons, named Button1 and Button2.
Set the Text property of Button1 to "Add", and set the Text property of Button2 to "Clear".
To update the running total whenever a user selects the Add button, set its OnSelect property to this formula: Set( RunningTotal, RunningTotal + TextInput1 ) The mere existence of this formula establishes RunningTotal as a global variable that holds a number because of the + operator. You can reference RunningTotal anywhere in the app. Whenever the user opens this app, RunningTotal has an initial value of blank. The first time that a user selects the Add button and Set runs, RunningTotal is set to the value RunningTotal + TextInput1.
To set the running total to 0 whenever the user selects the Clear button, set its OnSelect property to this formula: Set( RunningTotal, 0 )
Add a Label control, and set its Text property to RunningTotal. This formula will automatically be recalculated and show the user the value of RunningTotal as it changes based on the buttons that the user selects.
Preview the app, and we have our adding machine as described above. Enter a number in the text box and press the Add button a few times. When ready, return to the authoring experience using the Esc key.
To show the global variable's value, select the File menu, and select Variables in the left-hand pane.
To show all the places where the variable is defined and used, select it.
Types of variables
Power Apps has three types of variables:
Click to read more.
Create and remove variables
All variables are created implicitly when they appear in a Set, UpdateContext, Navigate, Collect, or ClearCollect function. To declare a variable and its type, you need only include it in any of these functions anywhere in your app. None of these functions create variables; they only fill variables with values. You never declare variables explicitly as you might in another programming tool, and all typing is implicit from usage.
For example, you might have a button control with an OnSelect formula equal to Set( X, 1 ). This formula establishes X as a variable with a type of number. You can use X in formulas as a number, and that variable has a value of blank after you open the app but before you select the button. When you select the button, you give X the value of 1.
If you added another button and set its OnSelect property to Set( X, "Hello" ), an error would occur because the type (text string) doesn't match the type in the previous Set (number). All implicit definitions of the variable must agree on type. Again, all this happened because you mentioned X in formulas, not because any of those formulas had actually run.
You remove a variable by removing all the Set, UpdateContext, Navigate, Collect, or ClearCollect functions that implicitly establish the variable. Without these functions, the variable doesn't exist. You must also remove any references to the variable because they will cause an error.
Variable lifetime and initial value
All variables are held in memory while the app runs. After the app closes, the values that the variables held are lost.
You can store the contents of a variable in a data source by using the Patch or Collect functions. You can also store values in collections on the local device by using the SaveData function.
When the user opens the app, all variables have an initial value of blank.
Reading variables
You use the variable's name to read its value. For example, you can define a variable with this formula:
Set( Radius, 12 )
Then you can simply use Radius anywhere that you can use a number, and it will be replaced with 12:
Pi() * Power( Radius, 2 )
If you give a context variable the same name as a global variable or a collection, the context variable takes precedence. However, you can still reference the global variable or collection if you use the disambiguation operator [@Radius].
Use a context variable
Let's look at how our adding machine would be created using a context variable instead of a global variable.
How context variables work:
You implicitly establish and set context variables by using the UpdateContext or Navigate function. When the app starts, the initial value of all context variables is blank.
You update context variables with records. In other programming tools, you commonly use "=" for assignment, as in "x = 1". For context variables, use { x: 1 } instead. When you use a context variable, use its name directly without the record syntax.
You can also set a context variable when you use the Navigate function to show a screen. If you think of a screen as a kind of procedure or subroutine, this approach resembles parameter passing in other programming tools.
Except for Navigate, context variables are limited to the context of a single screen, which is where they get their name. You can't use or set them outside of this context.
Context variables can hold any value, including strings, numbers, records, and tables.
Let's rebuild our adding machine by using a context variable:
Add a text-input control, named TextInput1, and two buttons, named Button1 and Button2.
Set the Text property of Button1 to "Add", and set the Text property of Button2 to "Clear".
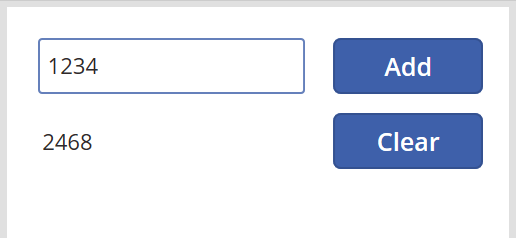
To update the running total whenever a user selects the Add button, set its OnSelect property to this formula: UpdateContext( { RunningTotal: RunningTotal + TextInput1 } ) The mere existence of this formula establishes RunningTotal as a context variable that holds a number because of the + operator. You can reference RunningTotal anywhere in this screen. Whenever the user opens this app, RunningTotal has an initial value of blank. The first time that the user selects the Add button and UpdateContext runs, RunningTotal is set to the value RunningTotal + TextInput1.
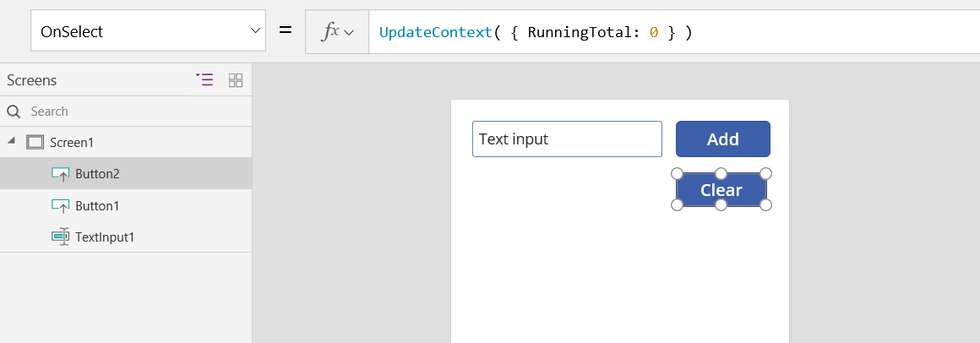
To set the running total to 0 whenever the user selects the Clear button, set its OnSelect property to this formula: UpdateContext( { RunningTotal: 0 } ) Again, UpdateContext is used with the formula UpdateContext( { RunningTotal: 0 } ).
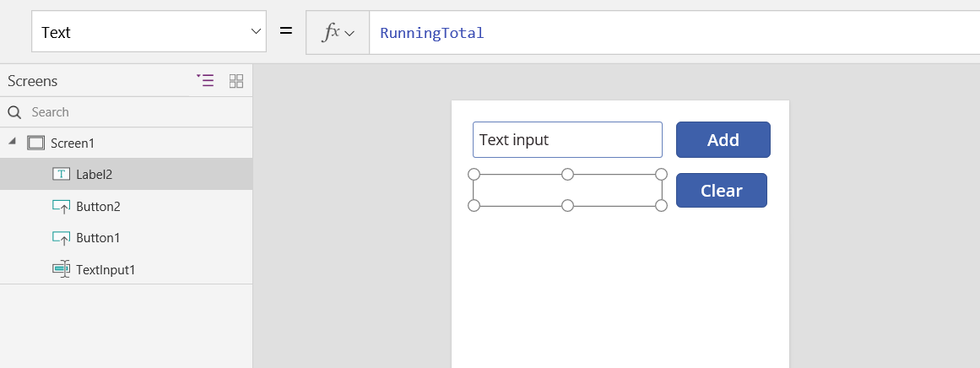
Add a Label control, and set its Text property to RunningTotal. This formula will automatically be recalculated and show the user the value of RunningTotal as it changes based on the buttons that the user selects.
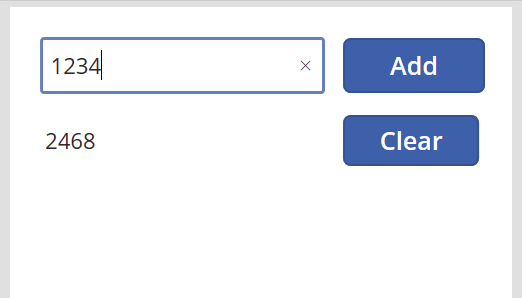
Preview the app and we have our adding machine as described above. Enter a number in the text box and press the Add button a few times. When ready, return to the authoring experience using the Esc key.
You can set the value of a context variable while navigating to a screen. This is useful for passing "context" or "parameters" from one screen to another. To demonstrate this technique, insert a screen, insert a button, and set its OnSelect property to this formula: Navigate( Screen1, None, { RunningTotal: -1000 } )
Hold down the Alt key while you select this button to both show Screen1 and set the context variable RunningTotal to -1000.
To show the value of the context variable, select the File menu, and then select Variables in the left-hand pane.
To show where the context variable is defined and used, select it.
Use a collection
Finally, let's look at creating our adding machine with a collection. Since a collection holds a table that is easy to modify, we will make this adding machine keep a "paper tape" of each value as they are entered.
How collections work:
Create and set collections by using the ClearCollect function. You can use the Collect function instead, but it will effectively require another variable instead of replacing the old one.
A collection is a kind of data source and, therefore, a table. To access a single value in a collection, use the First function, and extract one field from the resulting record. If you used a single value with ClearCollect, this will be the Value field, as in this example: First( VariableName ).Value
Let's recreate our adding machine by using a collection:
Add a Text input control, named TextInput1, and two buttons, named Button1 and Button2.
Set the Text property of Button1 to "Add", and set the Text property of Button2 to "Clear".
To update the running total whenever a user selects the Add button, set its OnSelect property to this formula: Collect( PaperTape, TextInput1.Text ) The mere existence of this formula establishes PaperTape as a collection that holds a single-column table of text strings. You can reference PaperTape anywhere in this app. Whenever a user opens this app, PaperTape is an empty table. When this formula runs, it adds the new value to the end of the collection. Because we're adding a single value, Collect automatically places it in a single-column table, and the column's name is Value, which you'll use later.
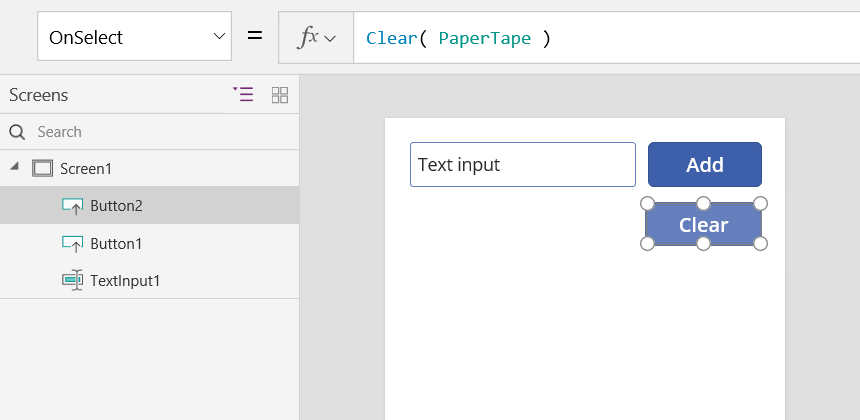
To clear the paper tape when the user selects the Clear button, set its OnSelect property to this formula: Clear( PaperTape )
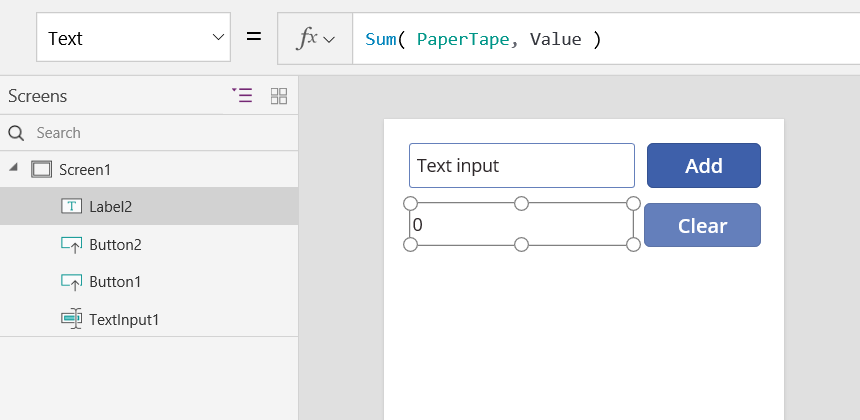
To display the running total, add a label, and set its Text property to this formula: Sum( PaperTape, Value )
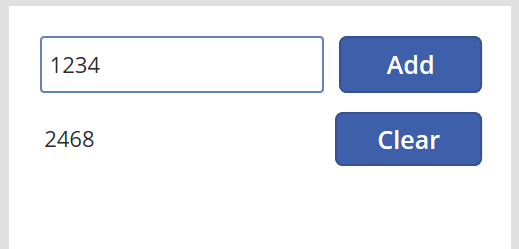
To run the adding machine, press F5 to open Preview, enter numbers in the text-input control, and select buttons.
To return to the default workspace, press the Esc key.
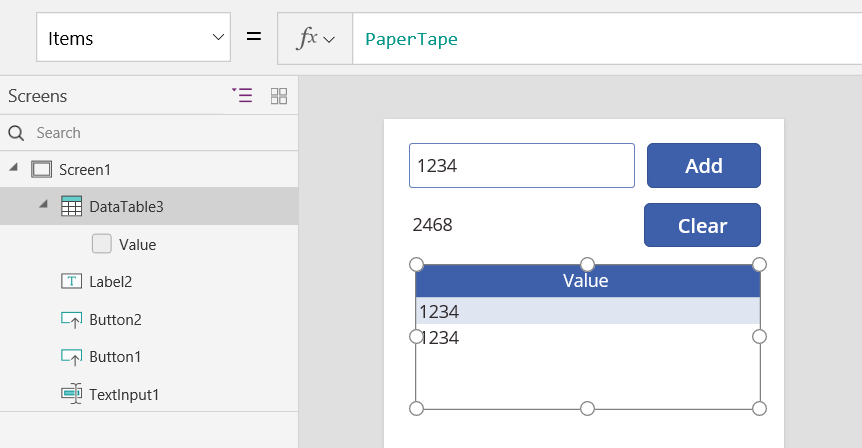
To display the paper tape, insert a Data table control, and set its Items property to this formula: PaperTape In the right-hand pane, select Edit fields and then select Add field, select Value column and then select Add to show it.
To see the values in your collection, select Collections on the File menu.
To store and retrieve your collection, add two additional button controls, and set their Text properties to Load and Save. Set the OnSelect property of the Load button to this formula: Clear( PaperTape ); LoadData( PaperTape, "StoredPaperTape", true ) You need to clear the collection first because LoadData will append the stored values to the end of the collection.
Set the OnSelect property of the Save button to this formula: SaveData( PaperTape, "StoredPaperTape" )
Preview again by pressing the F5 key, enter numbers in the text-input control, and select buttons. Select the Save button. Close and reload the app, and select the Load button to reload your collection.
Watch Talks Academy with Aroh Shukla on Power Apps - Session 2
The Tech Platform
Source: Microsoft














Comments