In this tutorial, I'll walk you through how to rebuild, package, and deploy cloud-native applications automatically with Quarkus.
In the previous articles in this series about cloud-native Java applications, I shared 6 requirements of cloud-native software and 4 things cloud-native Java must provide. But now you might want to implement these advanced Java applications in your local machine without climbing a steep learning curve. In this article, I will walk through using the open source technologies Quarkus and Visual Studio Code (VS Code) to accelerate the development of both traditional cloud-native Java stacks and also serverless, reactive applications with easier and more familiar methods.
Quarkus is a Kubernetes-native Java stack tailored for GraalVM and OpenJDK HotSpot. It's crafted from best-of-breed Java libraries and standards with live coding, unified configuration, superfast startup, small memory footprint, and unified imperative and reactive development. VS Code is an open source integrated development environment (IDE) for editing code.
Generate a Quarkus project
Begin by navigating to Quarkus' Start coding page to generate a Quarkus project that includes a RESTful endpoint. Leave all variables (i.e., Group, Artifact, Build Tool, Extensions) on the default settings, then click Generate your application at the top-right of the page. Note that the RESTEasy JAX-RS extension is preselected as default.
The ZIP file will automatically download on your local machine. Extract the file with the following command:
$ unzip code-with-quarkus.zip
Archive: code-with-quarkus.zip
    creating: code-with-quarkus/
   inflating: code-with-quarkus/pom.xml
   ...
Install VS Code
Download and install VS Code in your preferred way, whether that's from the website or through your package manager (dnf, apt, brew, etc). Once that's done, open the unzipped Quarkus project using VS Code's command-line tool:
$ cd code-with-quarkus/
$ code .
You will see the Apache Maven project structure with:
ExampleResource exposed on /hello
Associated JUnit test
Accessible landing page via http://localhost:8080
Dockerfiles for both native compilation and JVM HotSpot
A unified application configuration file
Add Quarkus tools to your IDE through the VS Code's extension feature.
Start coding
Run the application using Quarkus development mode. To run the application, you need:
JDK 1.8+ installed with JAVA_HOME configured appropriately
Apache Maven 3.6.3+
Move to the code-with-quarkus directory then type mvn compile quarkus:dev in VS Code's terminal.
You will see that the Java application is running well with:
About one second to startup
Live coding activated
EnabledCDI and RESTEASY features
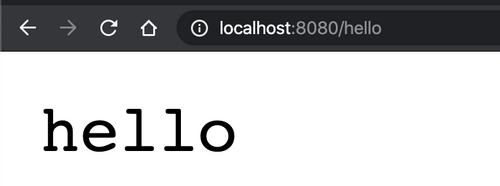
When you access the endpoint via a web browser, you will see the return code, hello.
Now, you're ready to change the code! Move back to VS Code, then open the ExampleResource.java file in src/main/java/org/acme. Replace the return code with "Welcome, Cloud-Native Java with Quarkus!" Don't forget to Save the file.
Go back to the web browser and reload the page.
It's like magic! Behind the scenes, Quarkus rebuilt, packaged, and deployed the application for you automatically, and it only took half a second. This is one of the essential cloud-native Java runtime features for increasing development productivity.
Continue running your cloud-native Java application in Quarkus.
Integrate data transactions via Quakrus Tool
To add an in-memory database (H2) transaction capability, press F1 then click on Quarkus: Add extensions to the current project.
Enter h2 in the search bar, then double-click on JDBC Driver - H2 Data in the result.
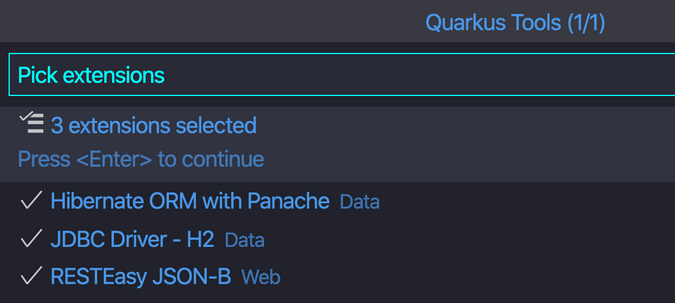
Select the following three extensions, which will simplify your persistence code and return JSON format data:
Hibernate ORM with Panache Data
JDBC Driver - H2
RESTEasy JSON-B Web
Press Enter to add those dependencies.
You should see the following in a new VS Code terminal:
You should also find the following pulled dependencies in POM.xml:
Create an Inventory entity
With your project in place, you can get to work defining the business logic.
The first step is to define the model (entity) of an Inventory object. Since Quarkus uses Hibernate ORM Panache, create an Inventory.java file in the src.main.java.org.acme directory, and paste the following code into it:
package org.acme;

import javax.persistence.Cacheable;
import javax.persistence.Entity;

import io.quarkus.hibernate.orm.panache.PanacheEntity;

@Entity
@Cacheable
public class Inventory extends PanacheEntity {

 public String itemId;
 public String location;
 public int quantity;
 public String link

 public Inventory() {

 }

}
Define the RESTful endpoint of Inventory
Next, mirror the abstraction of service so that you can inject the Inventory service into various places (like a RESTful resource endpoint) in the future. Create an InventoryResource.java file in the src.main.java.org.acme directory and add this code to it:
package org.acme;

import java.util.List;
import javax.enterprise.context.ApplicationScoped;
import javax.ws.rs.Consumes;
import javax.ws.rs.GET;
import javax.ws.rs.Path;
import javax.ws.rs.Produces;

@Path("/services/inventory")
@ApplicationScoped
@Produces("application/json")
@Consumes("application/json")
public class InventoryResource {

    @GET
    http://localhost:8080/services/inventory
 public List<Inventory> getAll() {
 return Inventory.listAll();
 }
}
Don't forget to save these files. Go back to your web browser and access a new endpoint, http://localhost:8080/services/inventory. You will see:
Wrapping up
If you have an issue or get an error when you implement this, you can find and reuse the code in my GitHub repository.
If you want to learn more, Quarkus has some practical and useful guides that show how to develop advanced cloud-native Java applications using Quarkus extensions with event-driven programming, serverless development, and Kubernetes deployment.
Source: Opensource.com


Comments