
The Z-Shell is a command interpreter for UNIX systems, or in UNIX jargon, a `shell', because it wraps around the commands you use. Zsh is a particularly powerful shell and it's free, and under regular maintenance ,with lots of interactive features allowing you to do the maximum work with the minimum fuss.
Zsh is a UNIX interactive shell with integrated scripting language that has specifically ideal for administration of UNIX and UNIX like systems. The shell is bash-like in a variety of methods, making it simple to obtain begun with for beginners and the scripting language has a clean syntax and effective functions that let users in order to take control of remote and regional systems alike without the language entering their method.
It is constructed to be a drop-in replacement for the standard party shell. The zsh provides modern-day auto-completion and auto-correction, effective scripting skills, and extensibility with modules. The main object that may not be clear is that users have to select each alternative and set it for it to be contributed to their setup. The zsh-newuser-install script (the menuing system users are now seeing) will not include any setup levels by default, even if they are advised.
History:
Paul Falstad wrote the first version of Zsh in 1990 while a student at Princeton University. The name zsh derives from the name of Yale professor Zhong Shao (then a teaching assistant at Princeton University) — Paul Falstad regarded Shao's login-id, "zsh", as a good name for a shell. Zsh is available as a separate package for Microsoft Windows as part of the UnxUtils collection of native Win32 ports of common GNU Unix-like utilities.
In 2019, macOS Catalina adopted Zsh as the default login shell, replacing the aging GPLv2 licensed version of Bash, and when Bash is run interactively on Catalina, a warning is shown by default.
In 2020, Kali Linux adopted Zsh as the default shell since 2020.4 release
Installing zsh
Like most things on your system, zsh needs to be installed and maintained; so, in this section we will learn how to do that. Note though, in order to avoid introducing inconsistencies and/or incompatibilities into your operating system, the recommended way of installing zsh is straight from your package maintainer's available sources. Either refer to your system's documentation or head to zsh's home page (http://zsh.sourceforge.net) to learn more about the whole installation procedure.
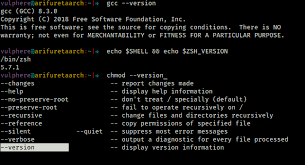
Before getting started, it would be a good idea to check whether you will need to install or update your current installation of zsh, as the package could already be installed on some Unix systems. So, open up your favorite terminal emulator and type in the following command:
$ echo $SHELL This should print out something like /bin/sh or /bin/bash on most systems, and this means that your current login shell is something other than zsh. If you see zsh in the result though, go ahead and call the following commands:
$ zsh --version zsh 5.0.2 (x86_64-apple-darwin12.3.0)
Copy
With some luck (and a healthy regime of system updates on your side, of course), you should see zsh's version, something that pretty much resembles the previous snippet. If that's the case, you can go ahead and skip this section. Should your operating system greet you with a polite zsh not found message. That's ok though, otherwise you wouldn't be reading these lines. Let's get into the installation part of the deal, shall we?
Installing on Linux
Depending on which distribution of Linux your PC is currently sporting, zsh might (or might not) be in its repositories or, better yet, already installed on your OS. You should always refer to your OS's package listing in the rare event that zsh is unavailable.
On Debian and its multitude of derived distributions—such as Ubuntu and Linux Mint—you could get the whole installation process completed by simply opening a terminal and running the following commands:
$ sudo apt-get update $ sudo apt-get install zsh Depending on your flavor of Debian and its repositories, you could get any version of zsh ranging from 4.3.x to 5.0.0 and upwards (if using any current release, at least). Again, try to stick to the latest and greatest whenever possible.
Tip You can always check the version of zsh by running zsh --version in the terminal. Red Hat-based distributions such as Fedora will need you to input the following commands:
$ sudo yum check-update $ sudo yum install zsh Then, there are the openSuSE users:
$ sudo zypper refresh $ sudo zypper install zsh And let's not forget the Arch user
$ sudo pacman -S zsh Wait for the download and installation scripts/triggers to complete, go ahead, and skip to the next section.
Installing on OS X
Arguably, the easiest way to get your hands on zsh in OS X is either via Homebrew (http://www.brew.sh) or MacPorts (http://www.macports.org), package managers that aim to extend the default options available to OS X users. Unfortunately, neither of these options come bundled with OS X. You will need to install either of the solutions before you can go ahead and make do with the latest version of zsh (which remains 5.0.2 at the time of writing this book). So, open your terminal emulator of preference, and either type:
$ brew install zsh or
$ sudo port install zsh Wait for the download and installation scripts to finish, and then go ahead and jump straight into the next section. Also, refer to the documentation of each application in order to troubleshoot any kind of problems that could come up during the installation of the package.
Features:
Programmable command-line completion that can help the user type both options and arguments for most used commands, with out-of-the-box support for several hundred commands
Sharing of command history among all running shells
Extended file globbing allows file specification without needing to run an external program such as find
Improved variable/array handling
Editing of multi-line commands in a single buffer
Spelling correction and autofill of command names (and optionally arguments, assumed to be file names)
Various compatibility modes, e.g. Zsh can pretend to be a Bourne shell when run as /bin/sh
Themeable prompts, including the ability to put prompt information on the right side of the screen and have it auto-hide when typing a long command
Loadable modules, providing among other things: full TCP and Unix domain socket controls, an FTP client, and extended math functions.
The built-in where command. Works like the which command but shows all locations of the target command in the directories specified in $PATH rather than only the one that will be used.
Named directories. This allows the user to set up shortcuts such as ~mydir, which then behave the way ~ and ~user do.
Advantages:
It is fully compatible with bash. Shell scripts can be fully compatible with previous usage habits under bash.
More powerful tab completion, when you switch the directory and tap twice, he can list all the directories under the current directory, and can use the keyboard up, down, left and right keys to select the directory
Command options are completed
Uppercase and lowercase letters are automatically corrected, for example, we want to cat README.txt, directly enter cat readme.txt TAB, then zsh will change the lowercase readme to uppercase. This function is very easy to use.
It has a variety of themes. If you use my script to install the oh-my-zsh project, you will find up to 142 in ~ / .oh-my-zsh / themes Theme, which theme you want to change directly in ~ / .zshrc:
More powerful alias commands, such as the following command, when you enter hello.py in the zsh environment, you can directly use vim to open the file for editing, and a tgz file can be automatically decompressed.
Smart command error correction, such as entering apt-gte install somefile, after entering, zsh will prompt you to correct apt-gte as apt-get? Enter y, then the correct command is executed . In conjunction with the sudo command setting of the zshrc profile, double-click ESC to automatically add sudo in front of the command.
it can integrate various types of plugins, such as switching directories can inherit autojump, where you want to jump, directly j plus the directory name, it is really very powerful, Very convenient, this bash can also be used. For example, if you want to go to the nginx directory, you can directly enter j nginx, and he will search for the path of nginx with the highest usage rate. If you want to go to nginx under / var / log /, enter j v ng directly.
Sofia Sondh
The Tech platform
Source: Wikipedia
Comentários